

How to set up a connection between invoiceAgent and dejiren
This article describes how to set up a connection between invoiceAgent and dejiren.
Prerequisites and required permissions
| Services | Required permissions | Operations requiring permissions |
|---|---|---|
| invoiceAgent | invoiceAgent administrative permissions | View connection setting information |
| dejiren | Edit permissions for VA (VA Admin or accounts with VA Editor role) | Create a connection setting |
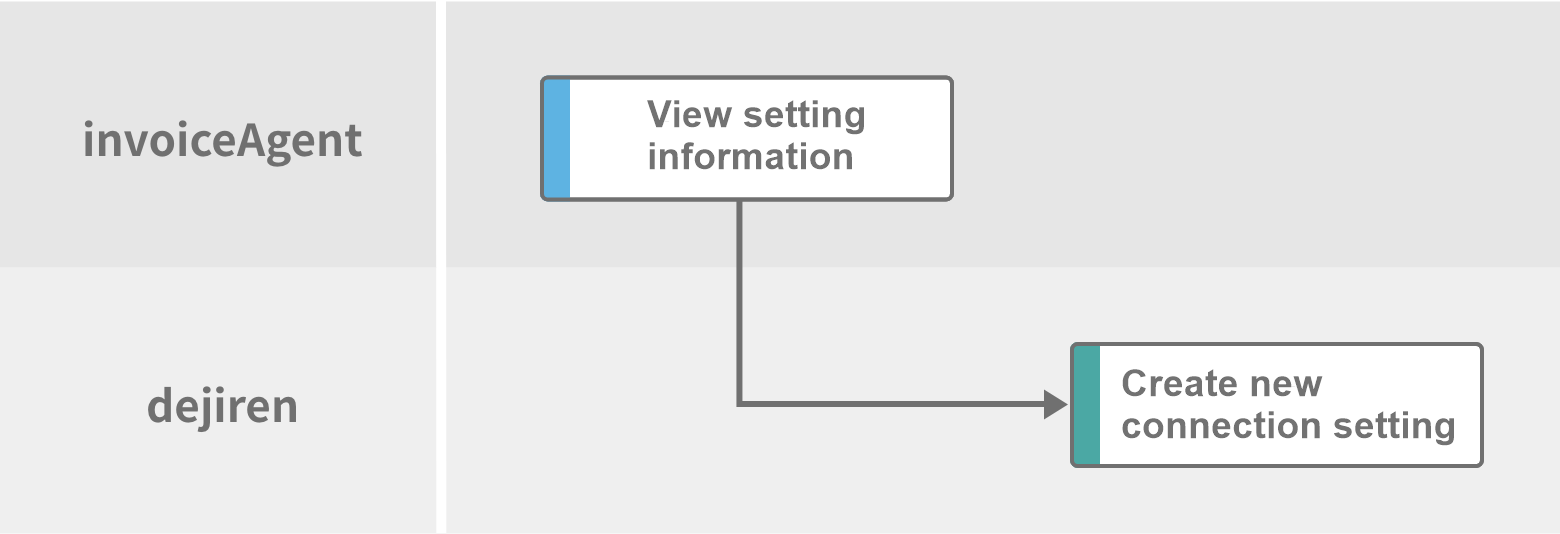
Setup overview
After confirming the URL, domain, and the account required to connect for invoiceAgent, create the connection setting in dejiren.
Setup procedure
Step 1: View invoiceAgent system information
- On the invoiceAgent login screen, note the following system information.
Settings Setting values Domain name local (default) dejiren Login URL for invoiceAgent Documents - The ID and password for the admin user should also be noted.
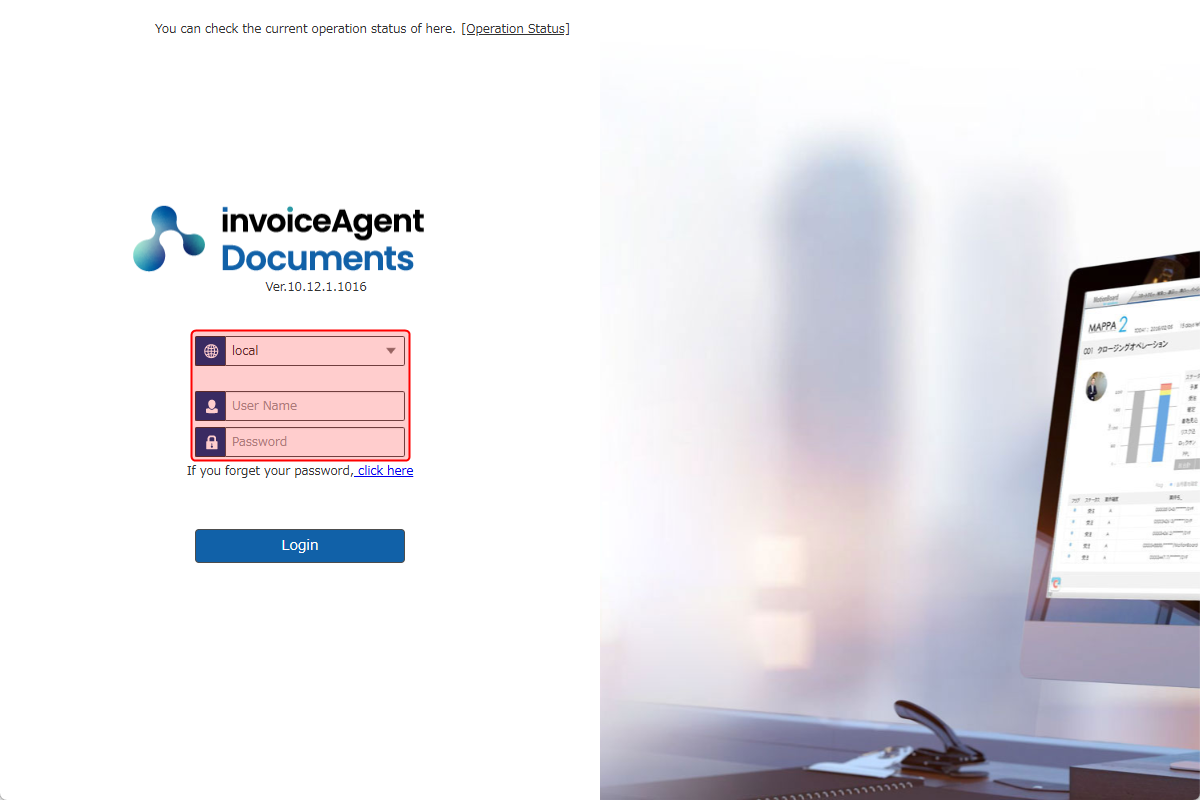
- Log in to invoiceAgent and note the secret value.
Note: Refer to the invoiceAgent documentation for how to view the initial secret value and custom settings.
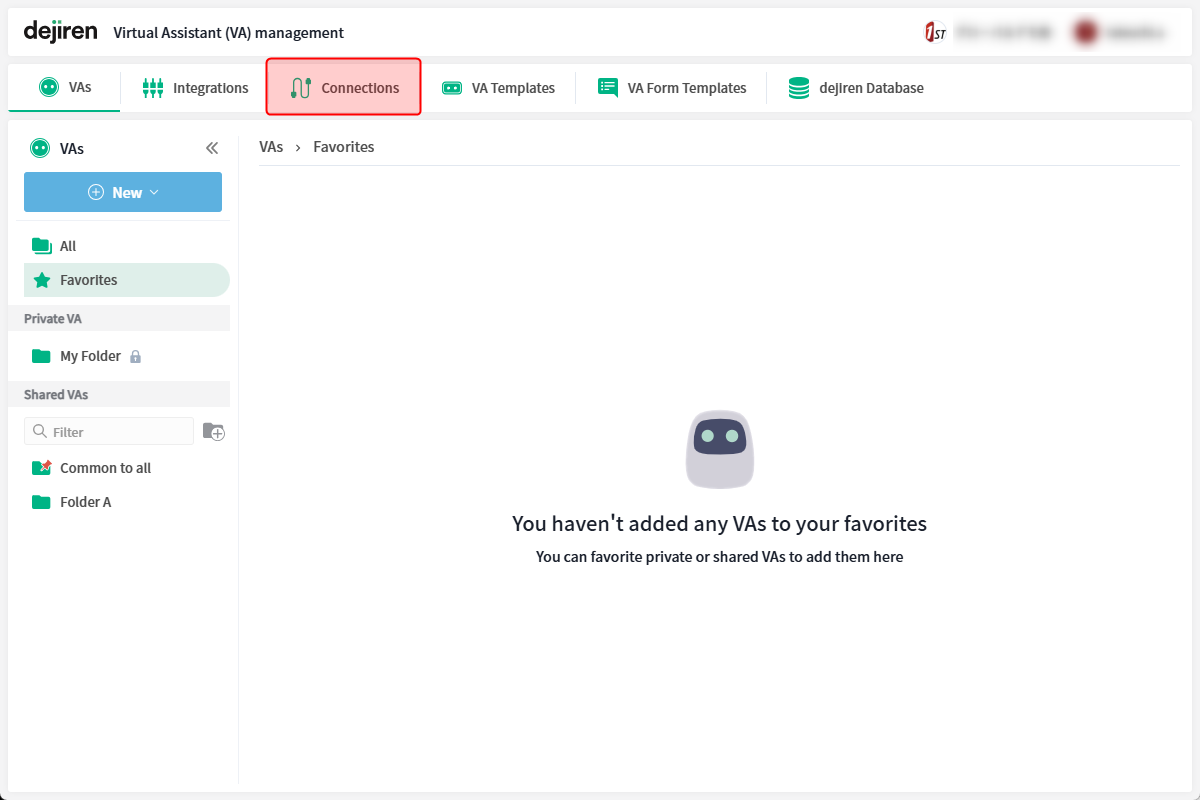
Step 2. Create a connection setting in dejiren
- Go to the dejiren Virtual Assistant (VA) management screen.
- Click Connections at the top of the page.
- On the Connections page, click New.
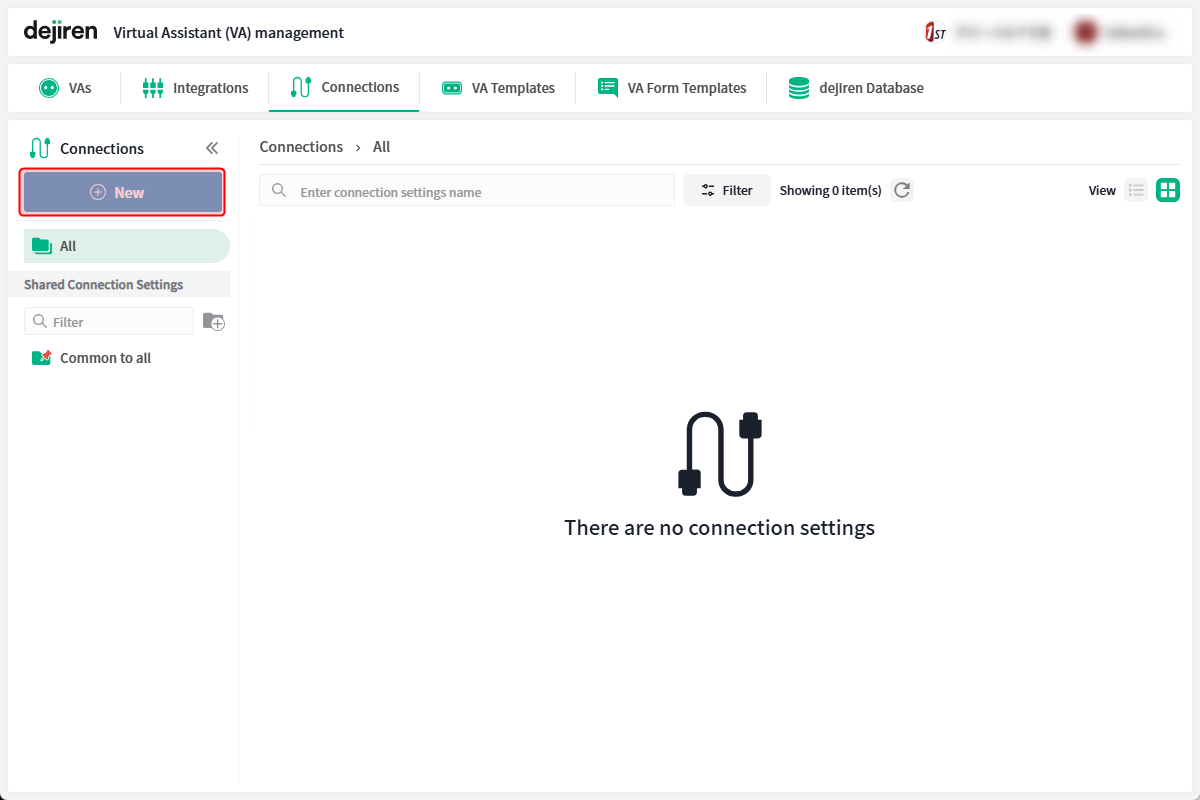
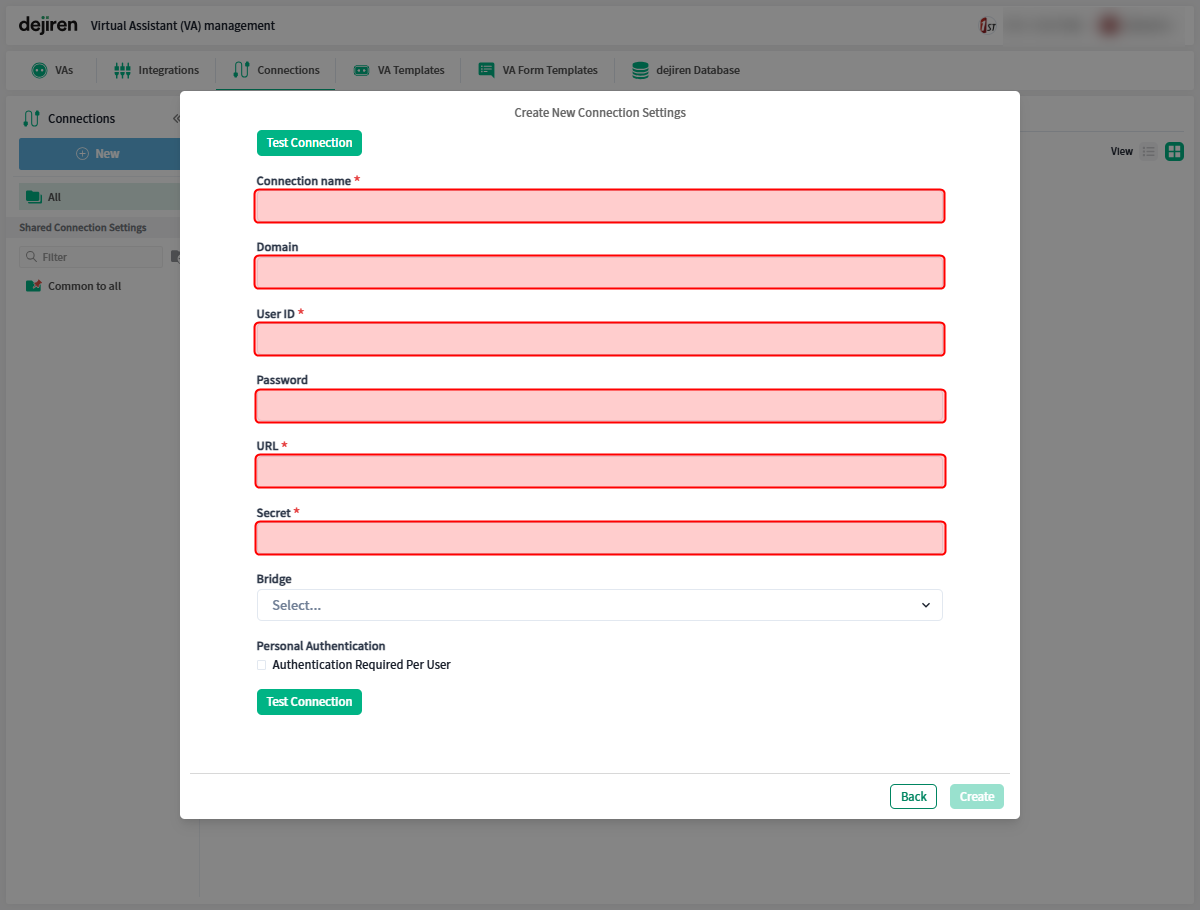
- The Create New Connection Settings dialog will appear.
Select invoiceAgent Documents and click Next.

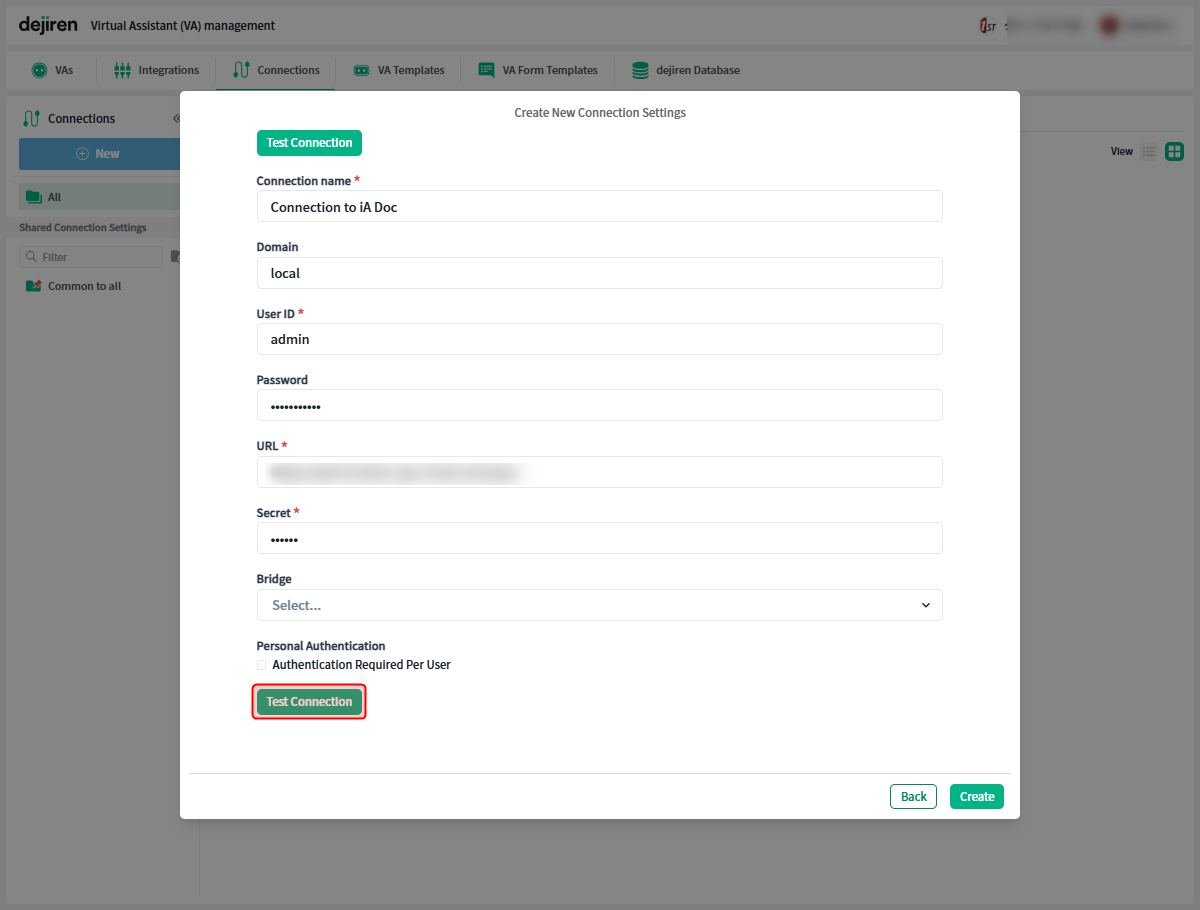
- The Create New Connection Settings page will appear. Enter a value in each field.
Settings Setting values Required Connection name Enter any name to identify this connection setting. Required Domain Enter the domain noted on the invoiceAgent login screen. – User ID Enter the user ID of the invoiceAgent. Required Password Enter the password that invoiceAgent users use to log in. Required URL Enter the URL noted on the invoiceAgent login screen. Required Secret Enter the secret value noted in invoiceAgent. Required Bridge – Required only if you use the on-premises version Personal Authentication – Usually not required
- Once you enter all fields, click Test Connection.
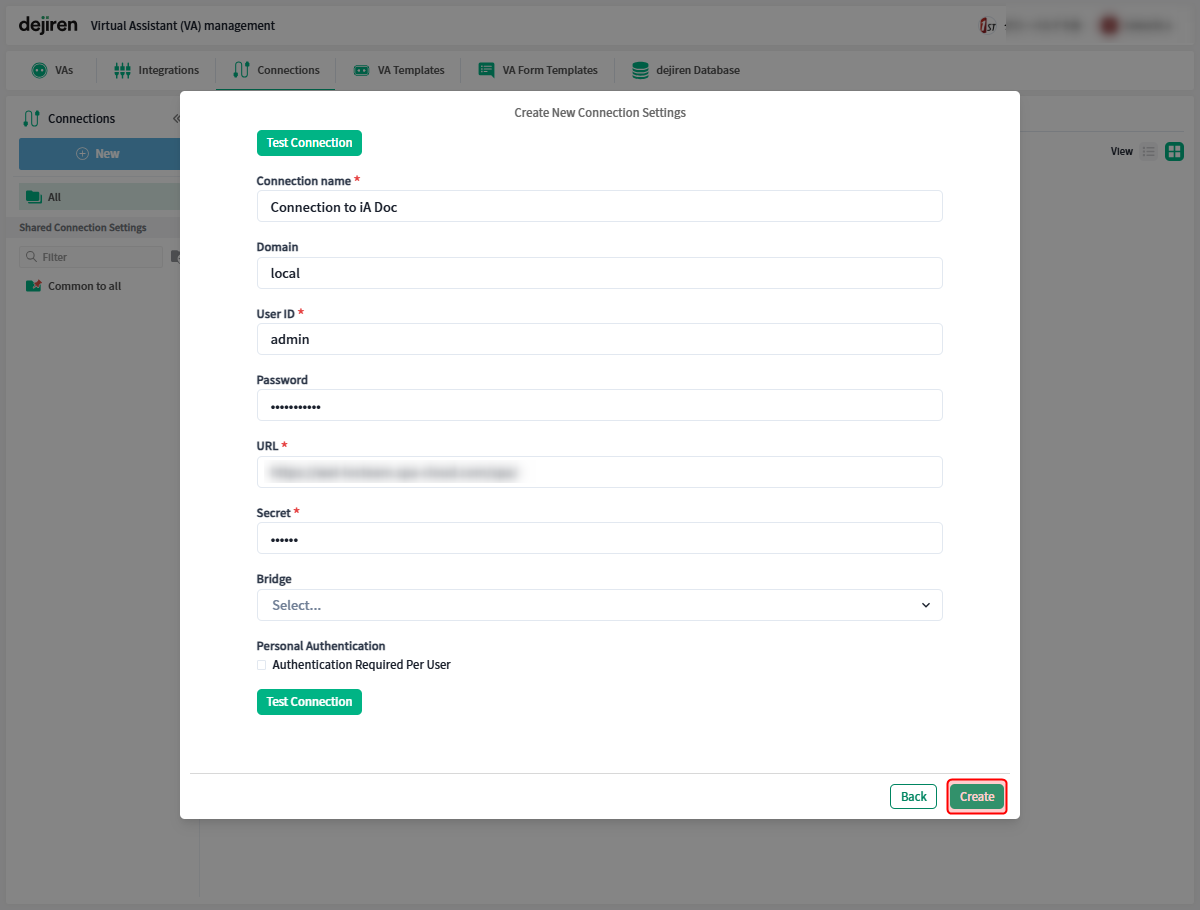
- If the connection is established successfully, the message “Connected successfully” is displayed on the dialog,
Click Close.

- Click Create to complete the creation of the connection setting.
- Returns to the connection settings list page.
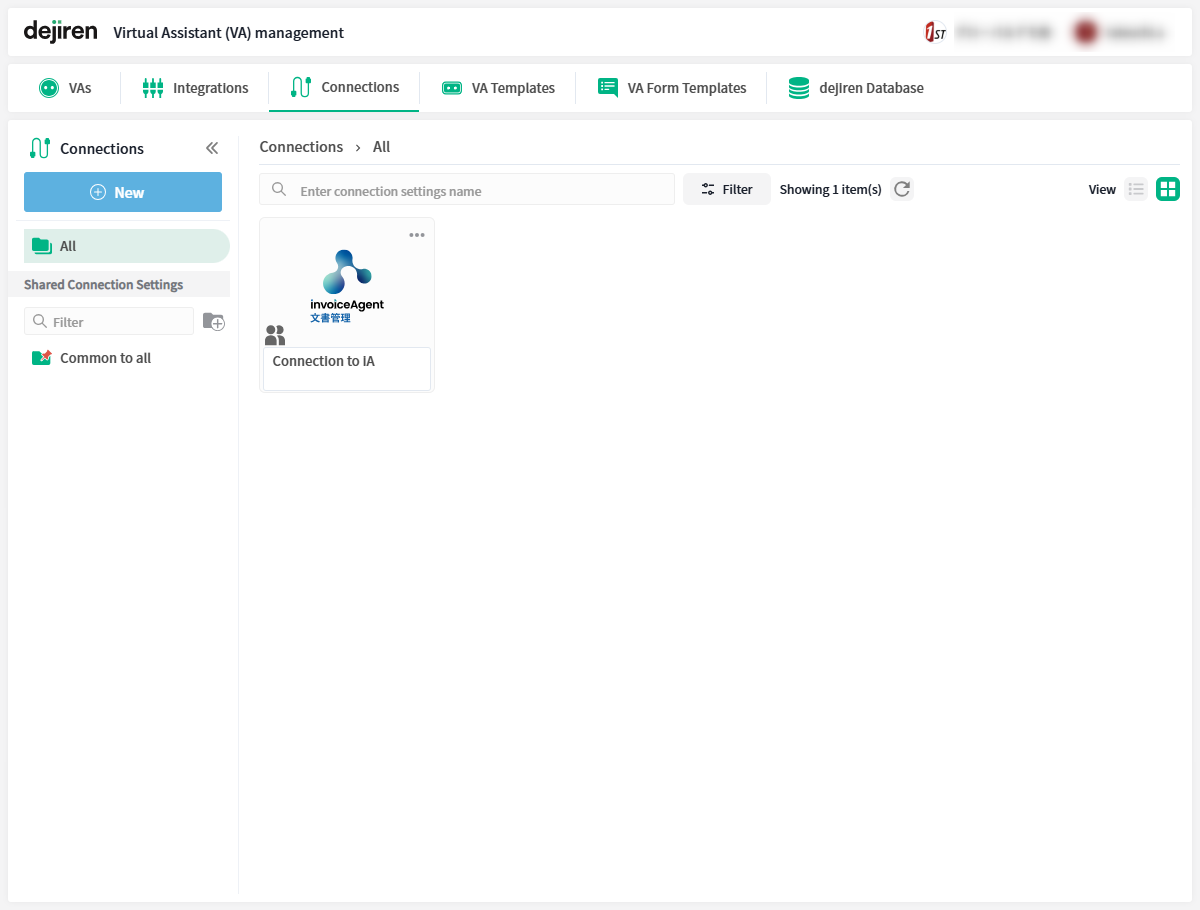
This completes the setup of a new connection between dejiren and invoiceAgent.