

SAML authentication settings (Microsoft Entra ID)
This article describes how to set up SAML authentication using Microsoft Entra ID.
Prerequisites and required permissions
- To use SAML authentication, a paid SAML option subscription is required.
- This article assumes that user accounts in Microsoft Entra ID (formerly Azure AD) have already been created.
| Services | Required permissions | Operations requiring permissions |
|---|---|---|
| Microsoft Azure | Administrator privileges | SAML settings |
| dejiren | System Admin | Authentication provider settings |
Setup flow
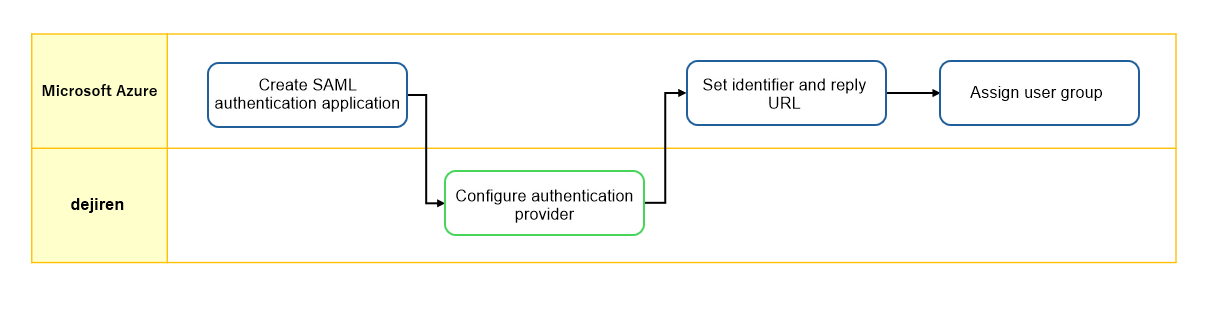
Setup procedure
Step 1. Create SAML authentication application
1. Log in to Azure Portal with an administrator account.
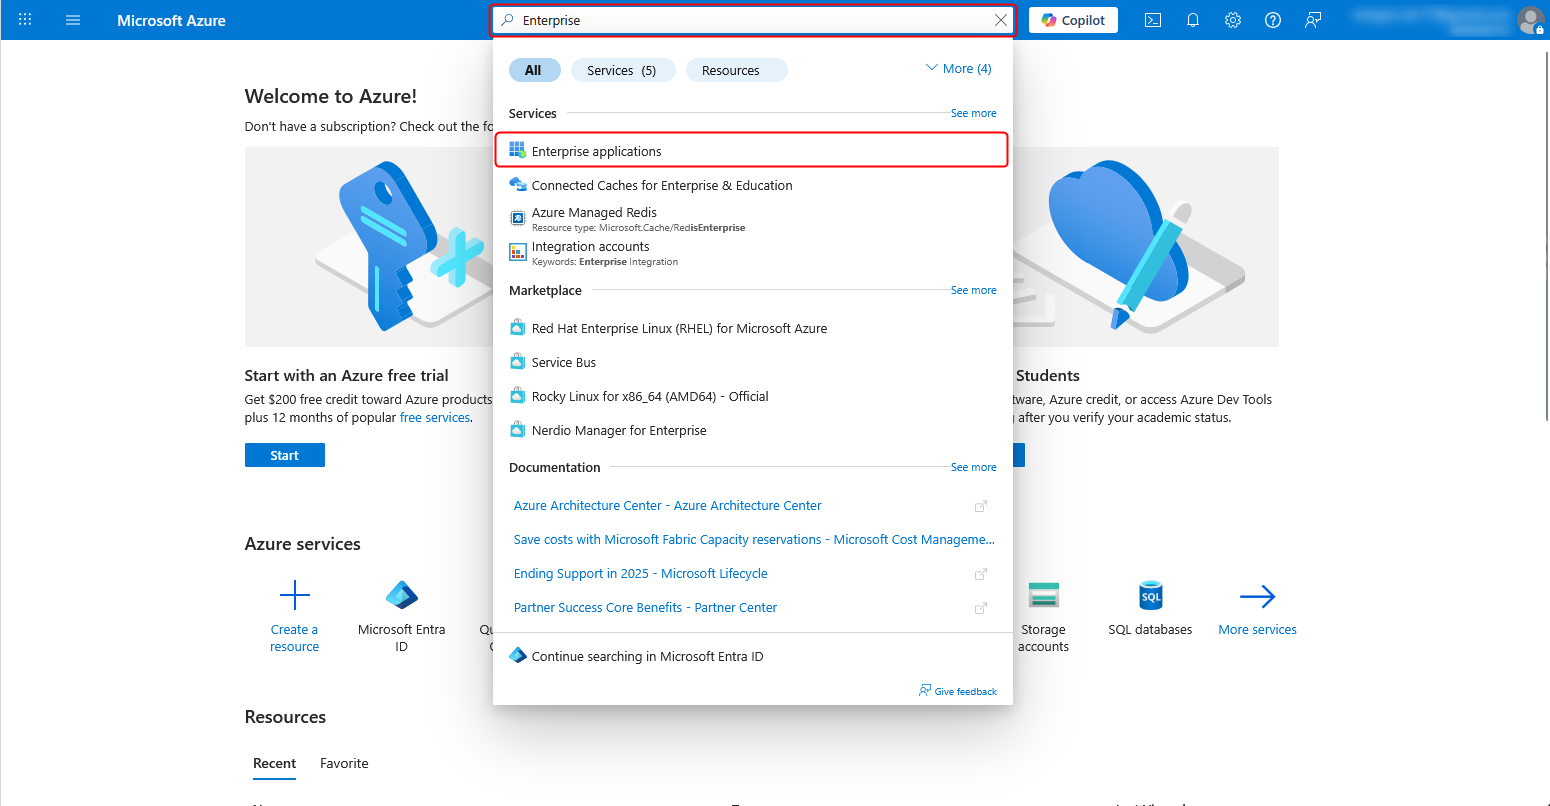
2. Enter “Enterprise” in the search field at the top of the page.
Select “Enterprise applications” from the search results displayed.
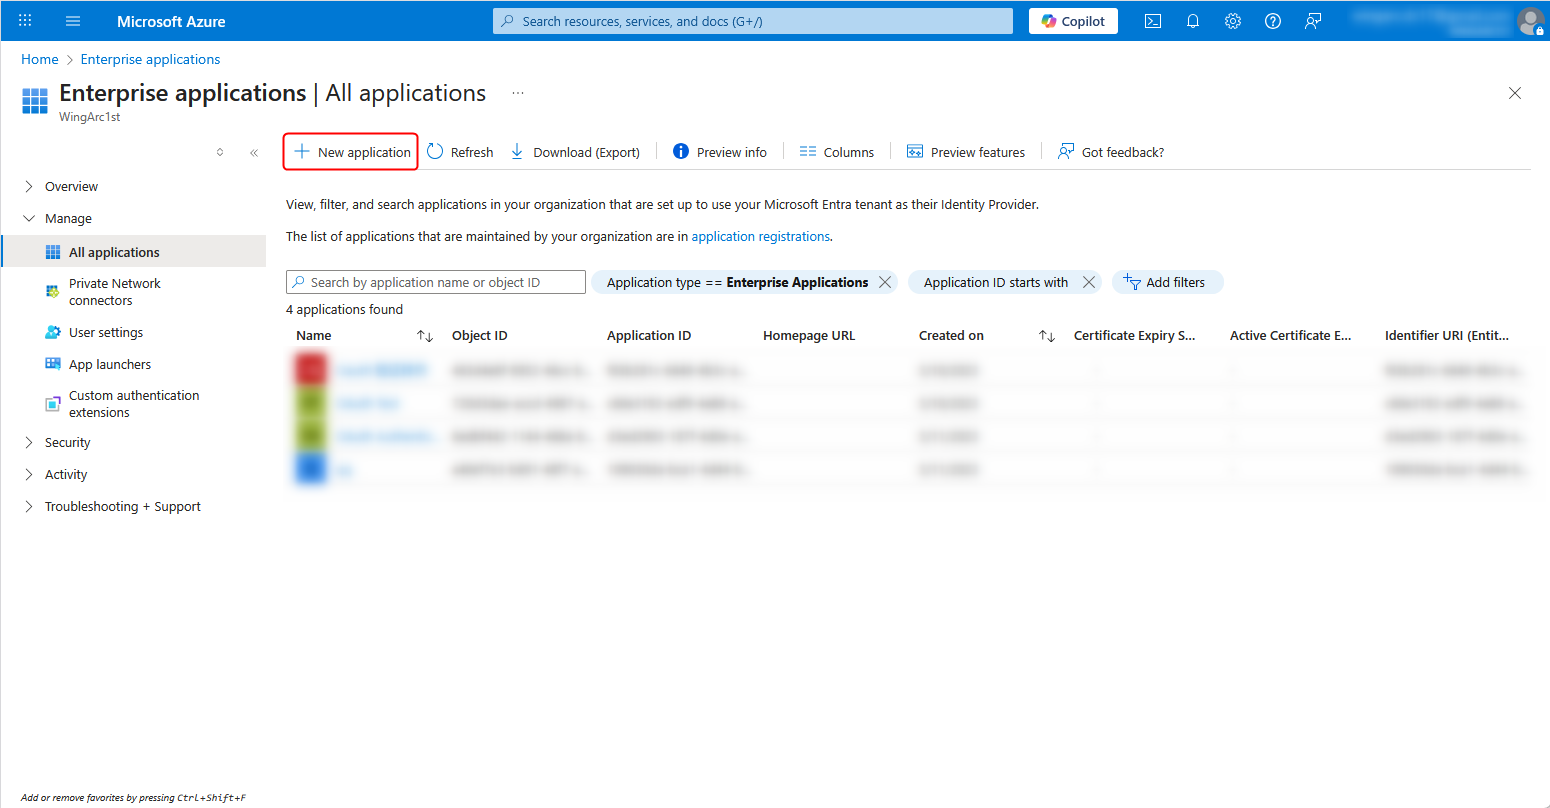
3. Click New application.
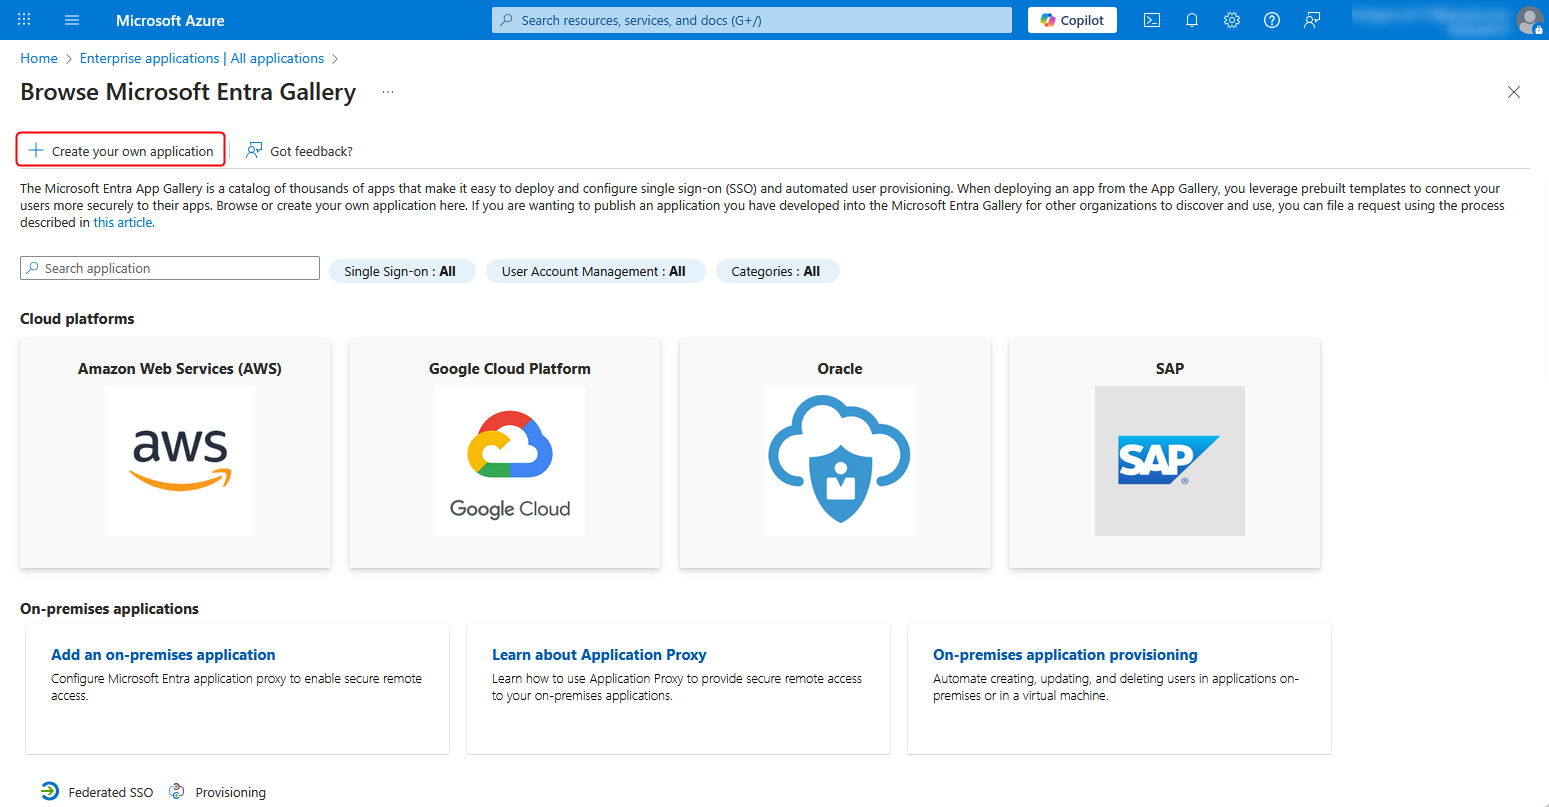
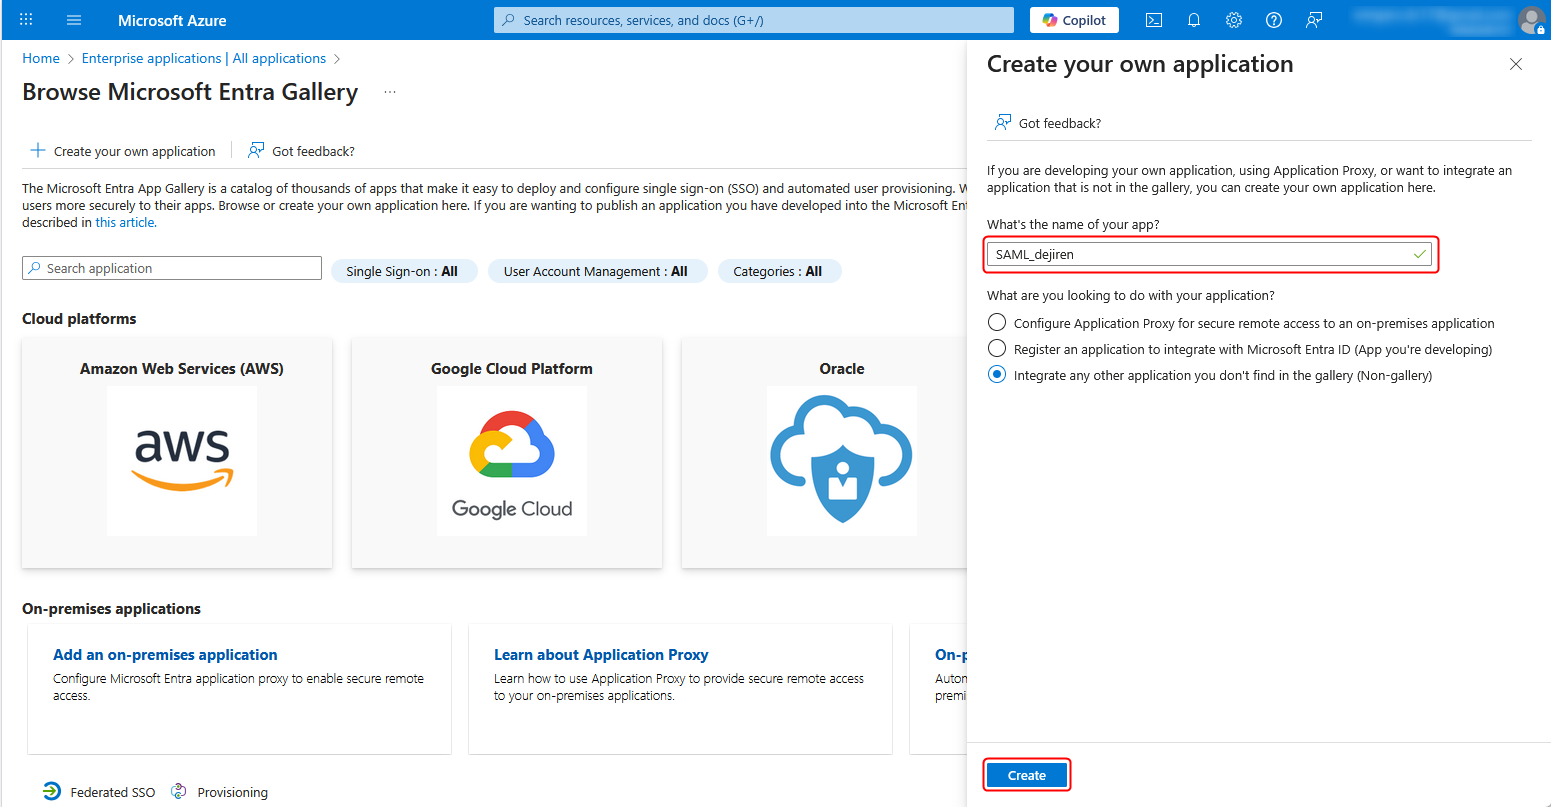
4. Click Create your own application.
5. Enter any application name in the field under What’s the name of your app? and click Create.
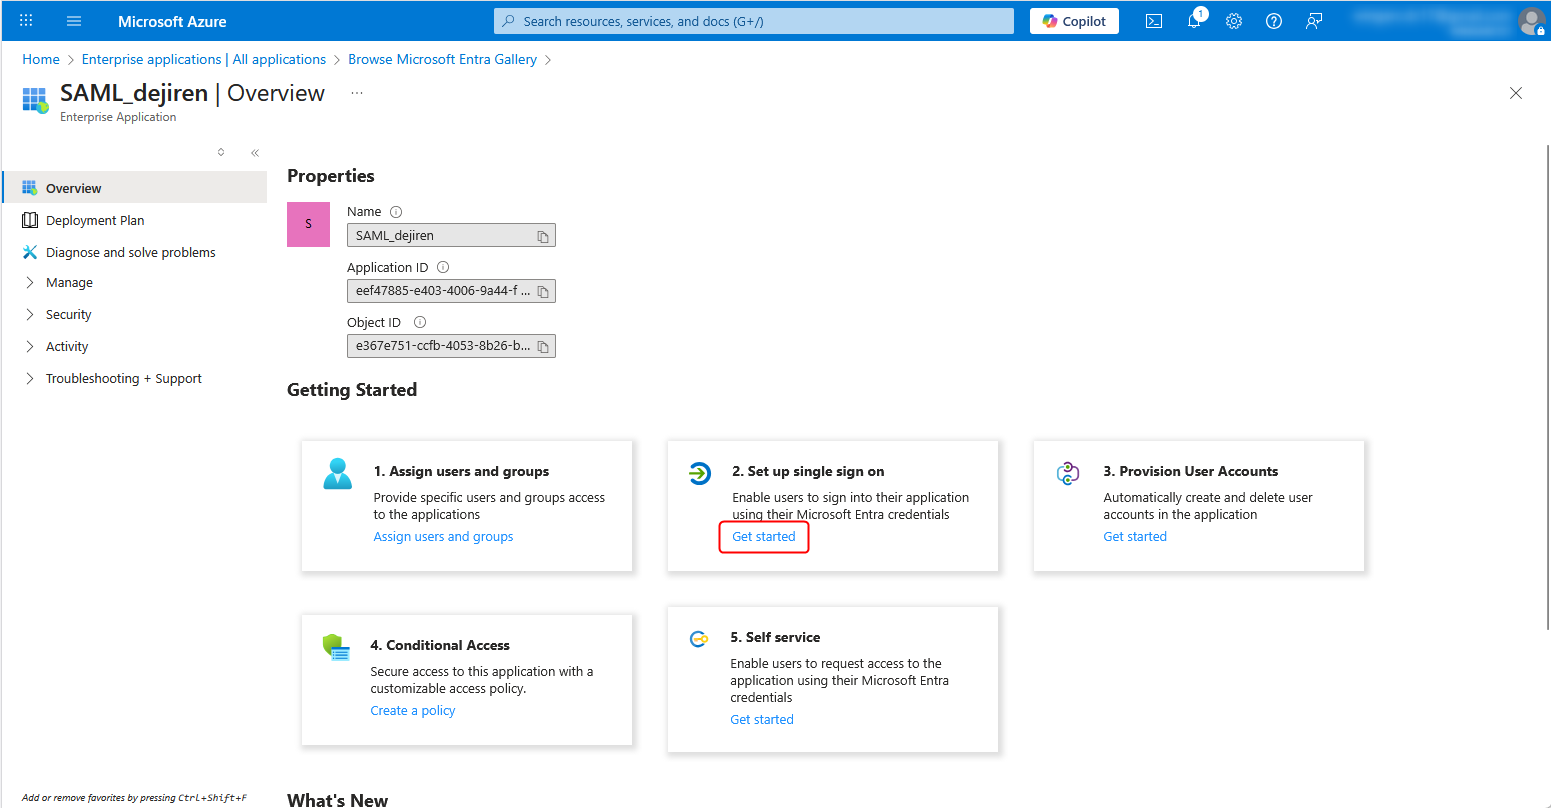
6. Click Get started under 2. Set up single sign on.
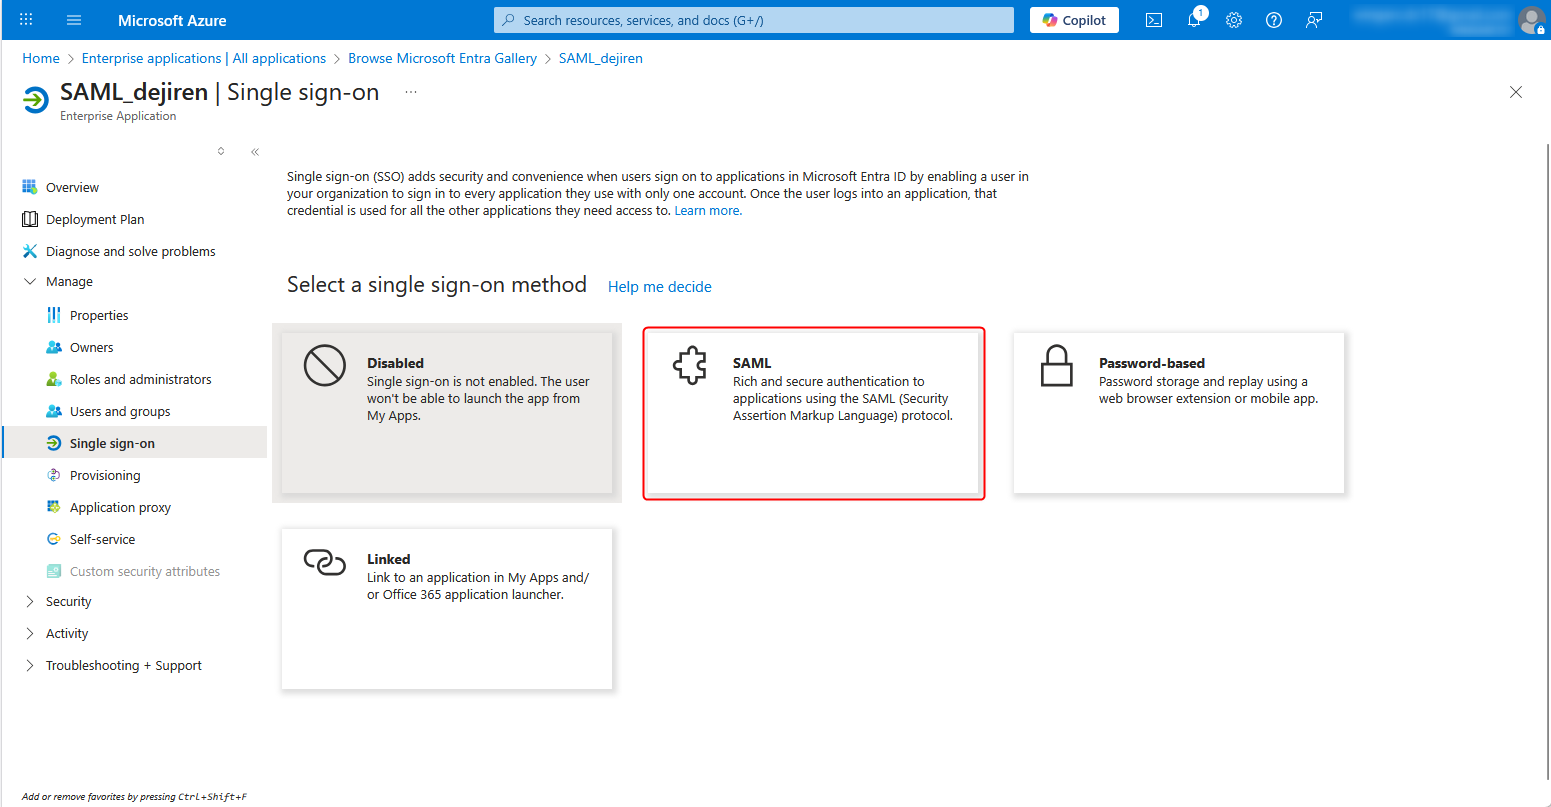
7. Click SAML under Select a single sign-on method.
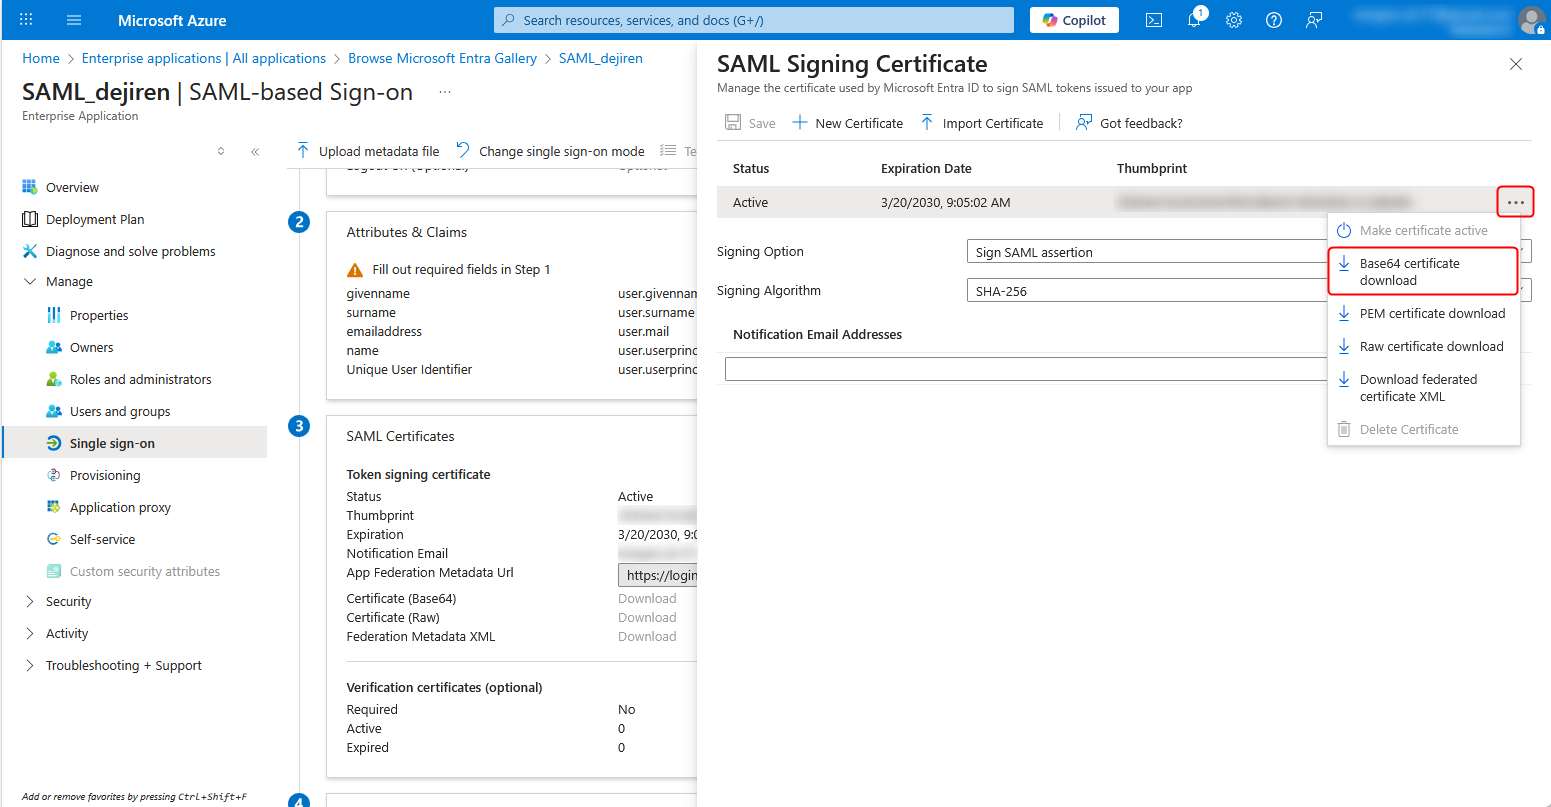
8. Click Edit for Token signing certificate.
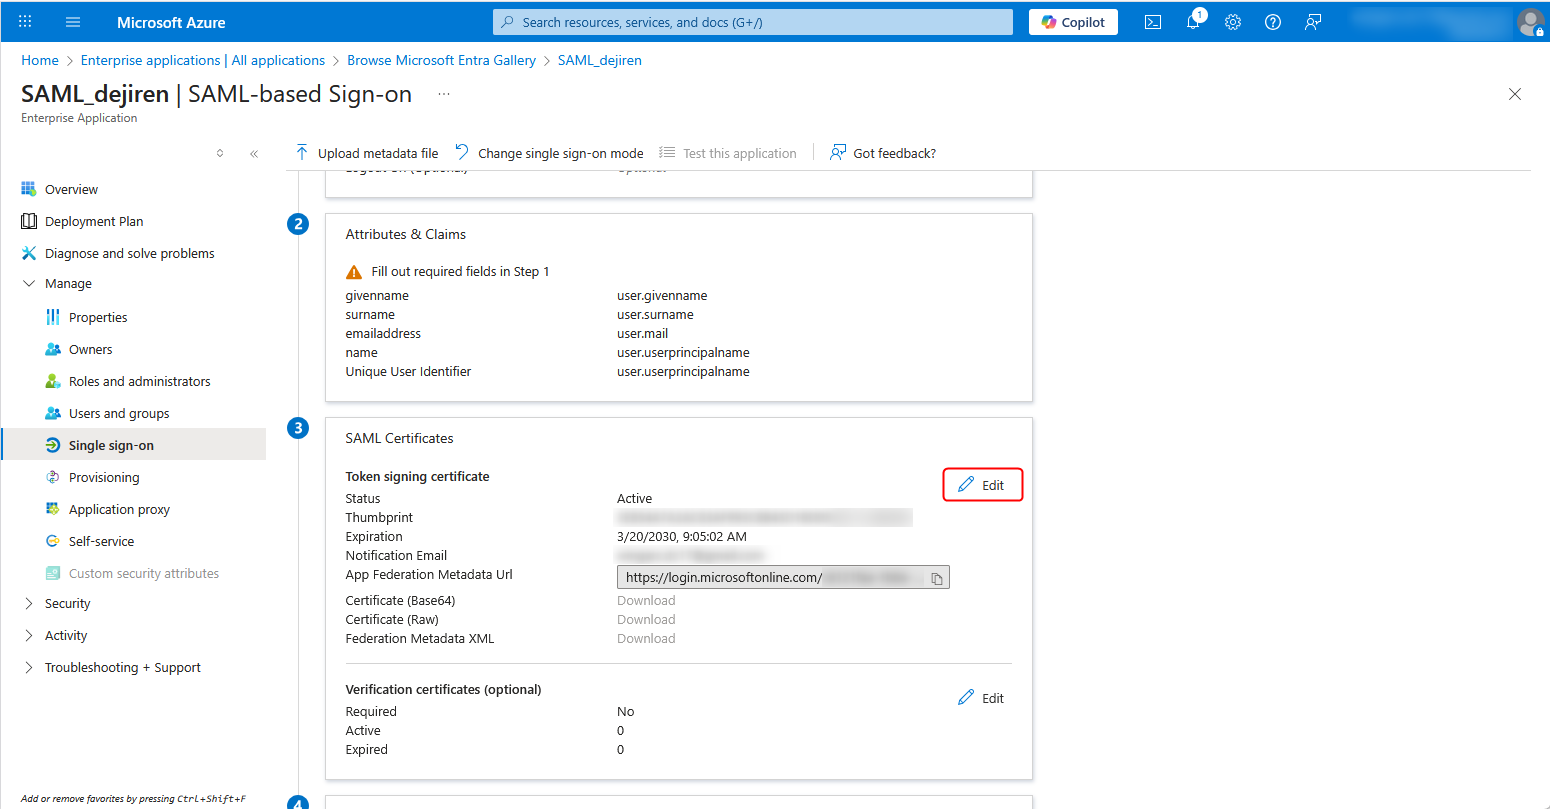
9. Click an ellipsis icon (…) to open the menu, and then click Base64 certificate download to download the certificate file.
Note: You will use the downloaded certificate file to set up the authentication provider in dejiren.
10. Download the Excel file “settings_info.xlsx”.
You will use it to note down the settings information in subsequent steps.
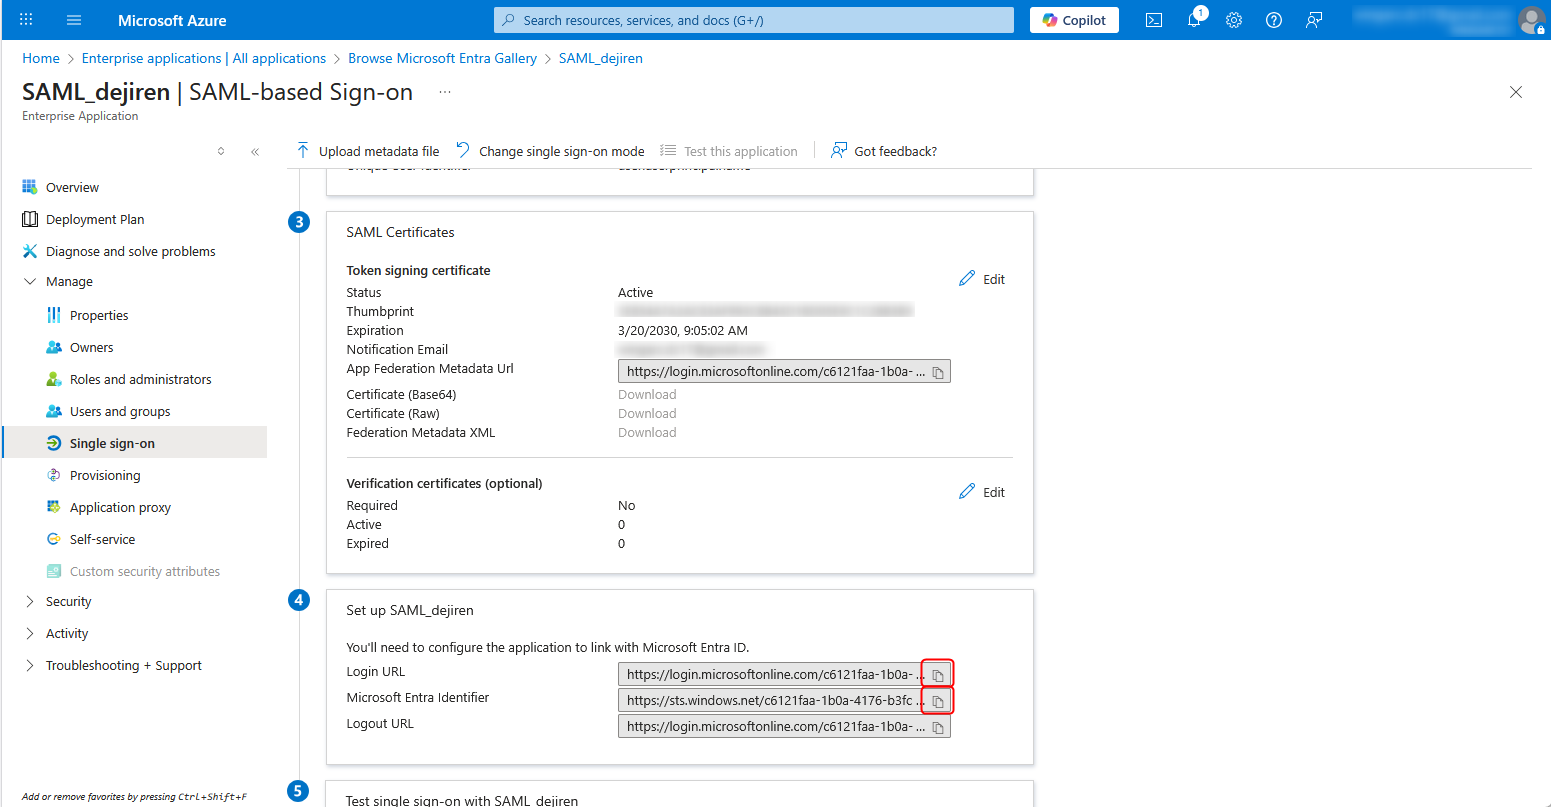
11. Copy the values for Login URL and Microsoft Entra Identifier and paste them to the Excel file “settings_info” respectively.
Note: In Step 3 below, you will resume the setup from this Azure setting page, so please keep it open even after completing Step 1-11.
Step 2. Configure authentication provider
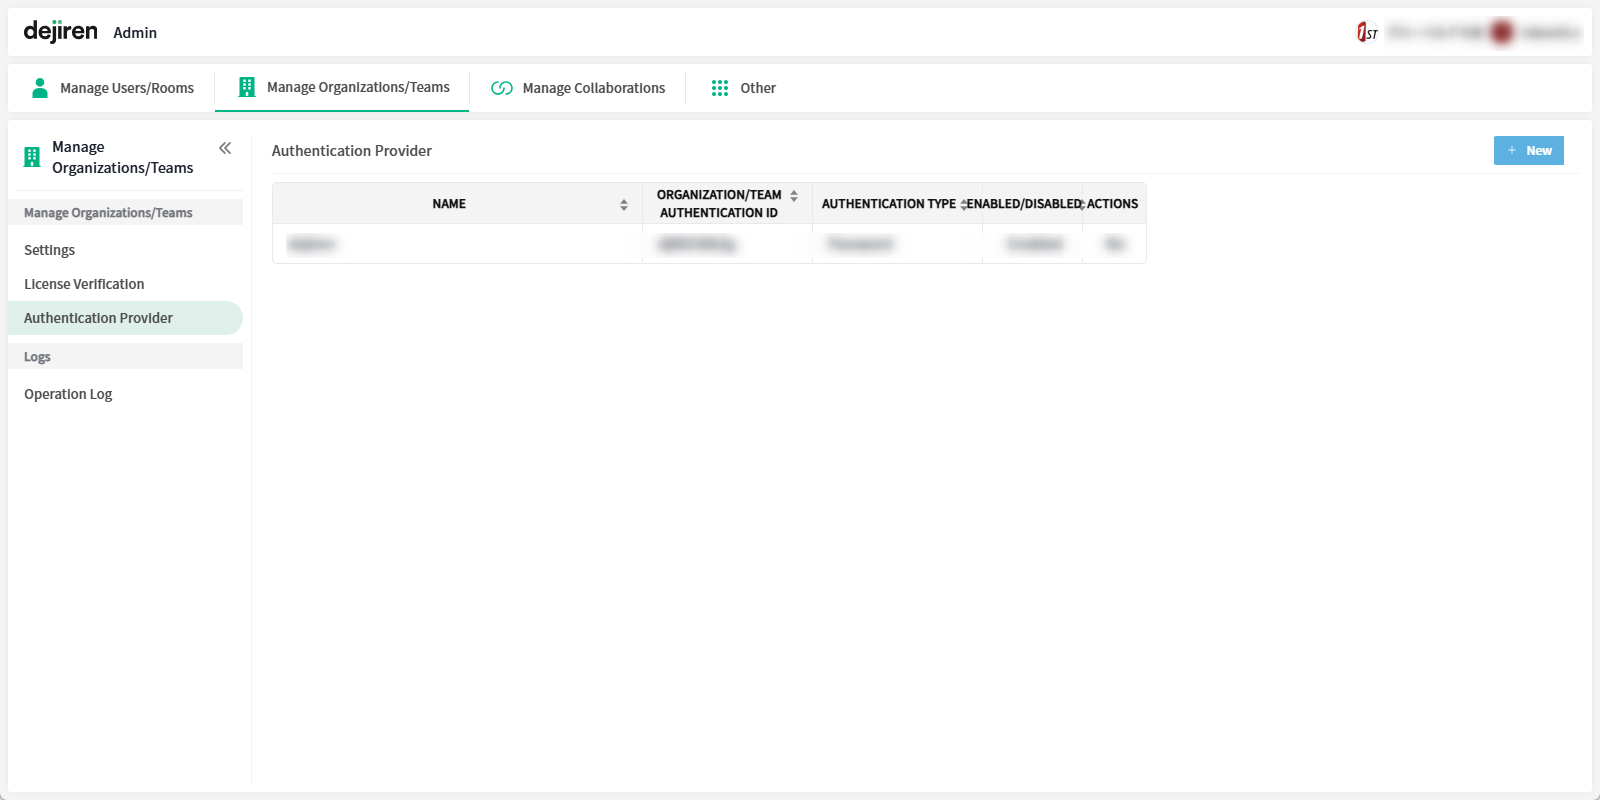
- Log in to the Admin page in dejiren as an account with System Admin role, and click Manage Organizations/Teams > Authentication Provider.
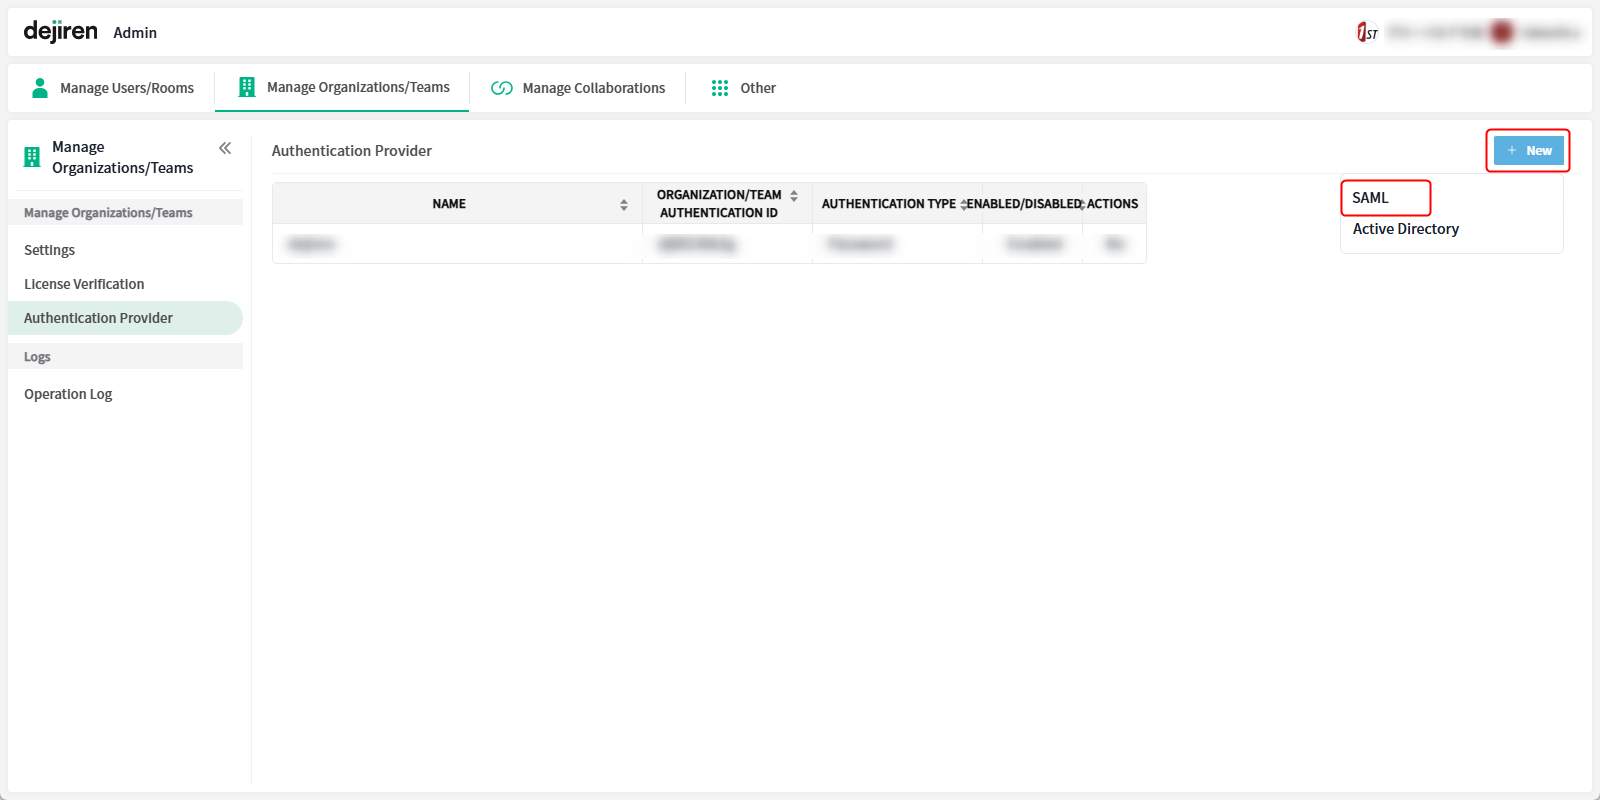
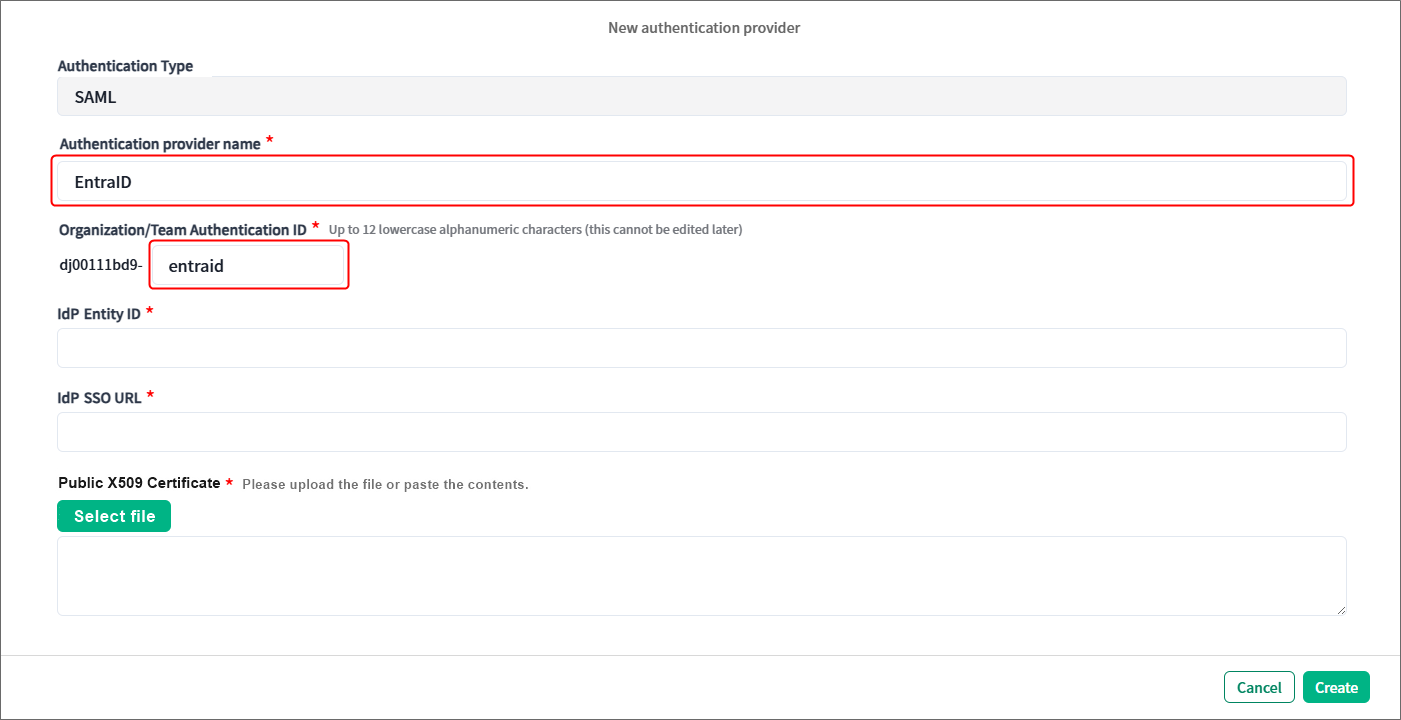
2. Click New in the upper right corner of the Authentication Provider page to open the menu, then select SAML.
3. Enter any name and ID to identify this authentication in the Authentication provider name and Organization/Team Authentication ID fields respectively.
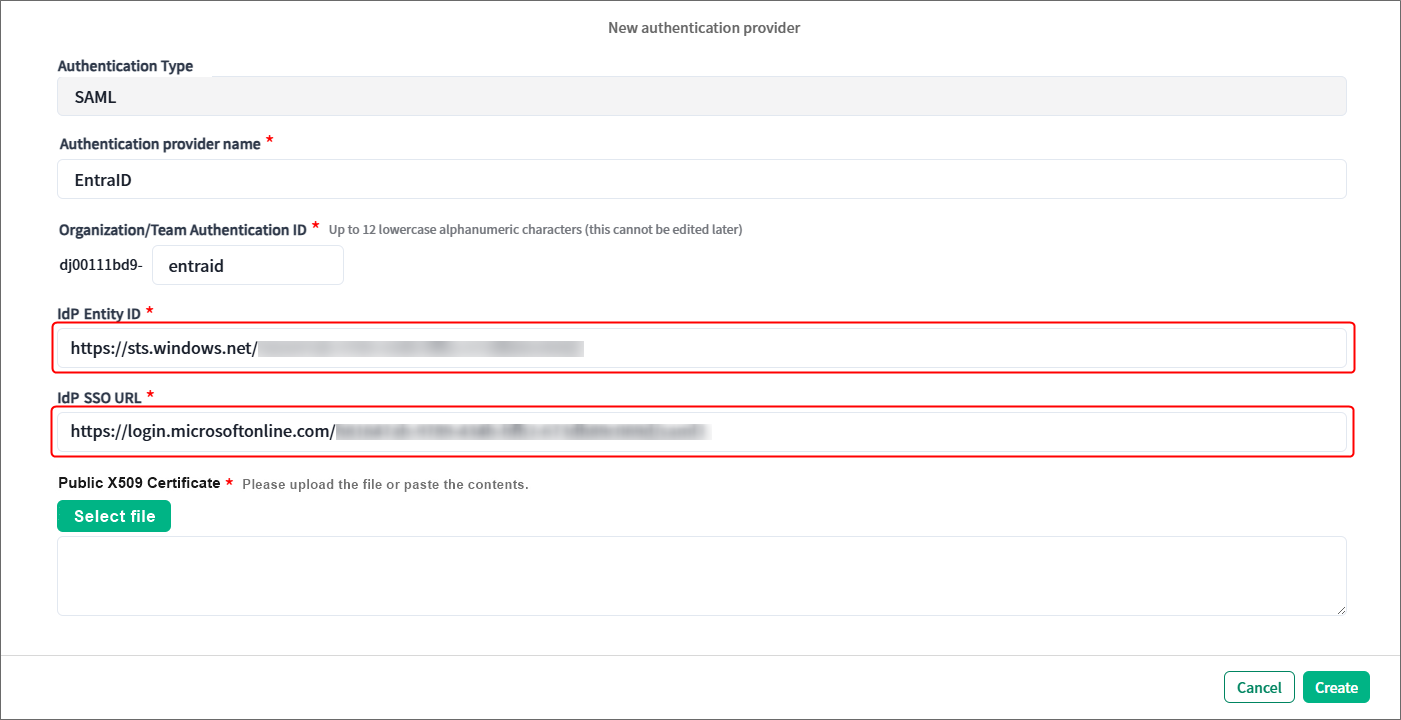
4. Enter the value for Login URL (that you noted in the Excel file “settings_info” in Step 1-11) in IdP SSO URL field, and the value for Microsoft Entra Identifier in IdP Entity ID field.
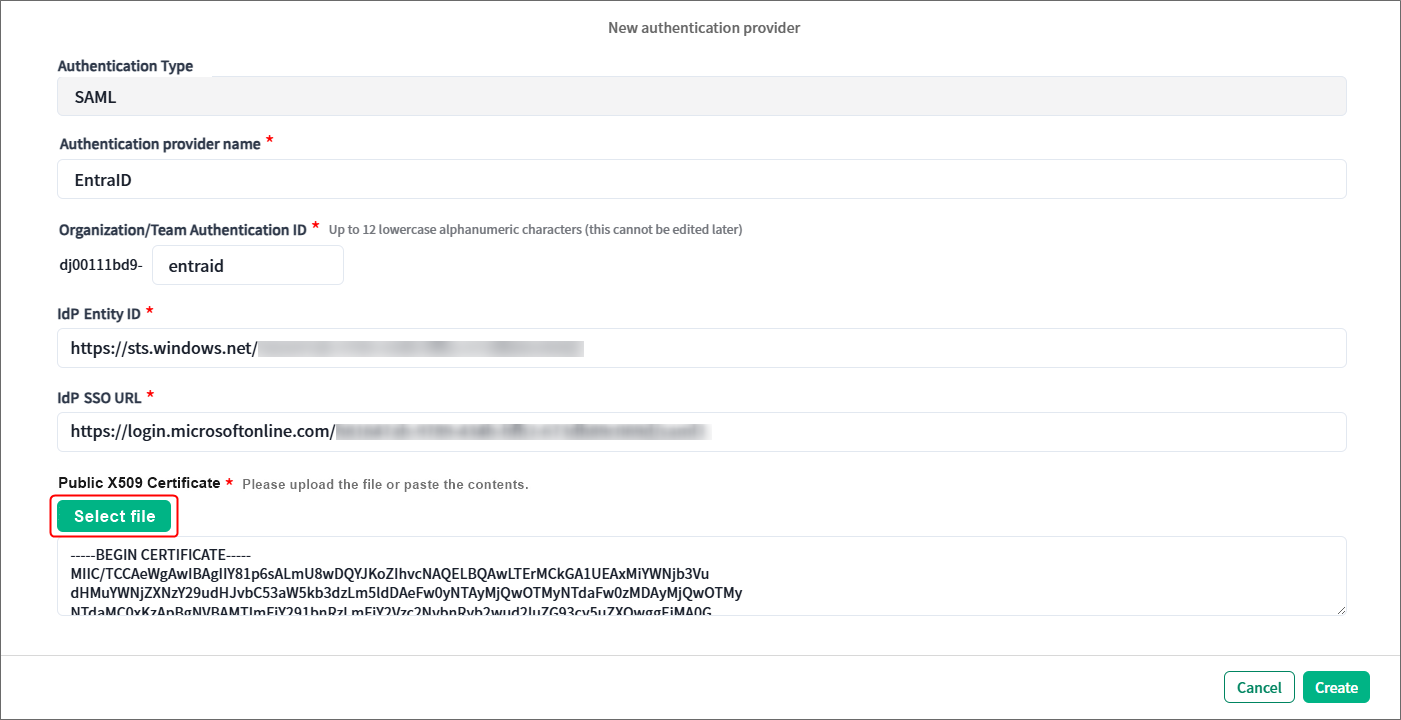
5. Click Select file under Public X509 Certificate, and upload the certificate file that you downloaded in Step 1-9.
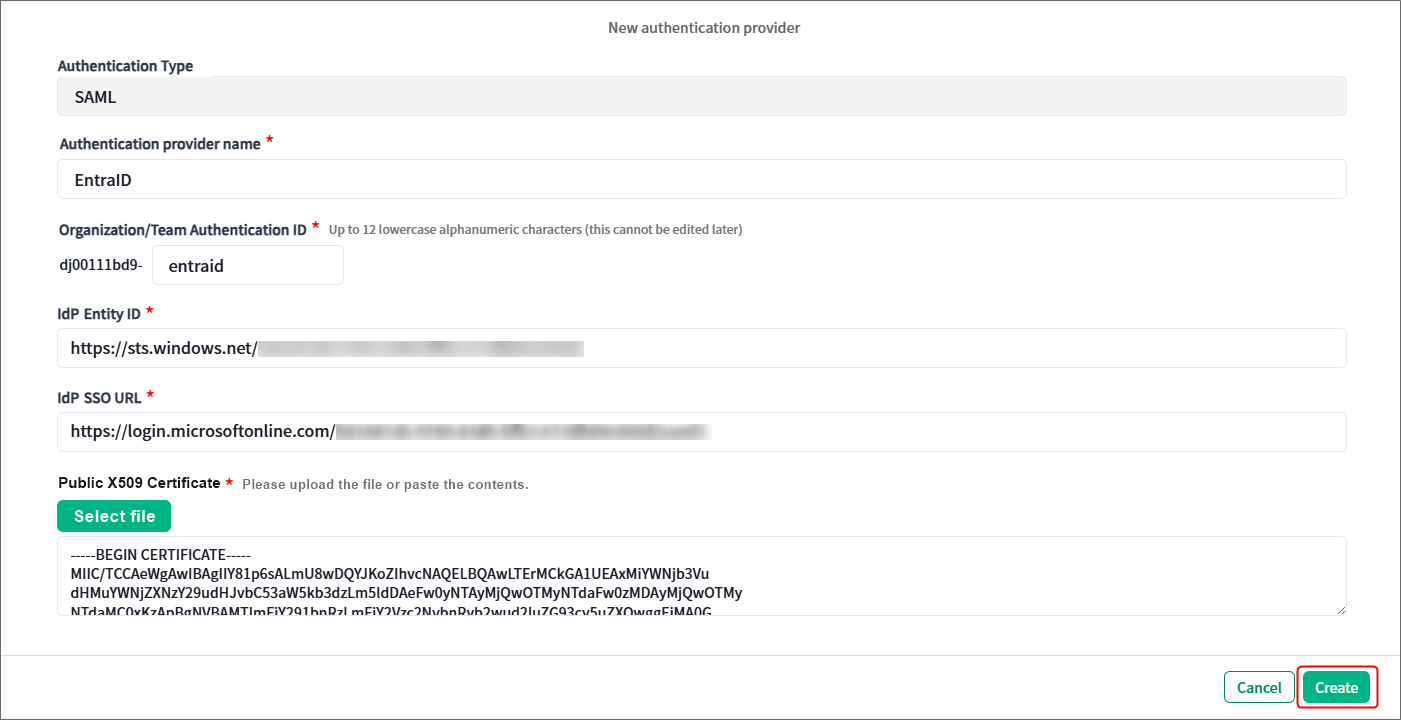
6. Make sure that all required fields have been filled out, and click Create in the lower right corner of the dialog box.
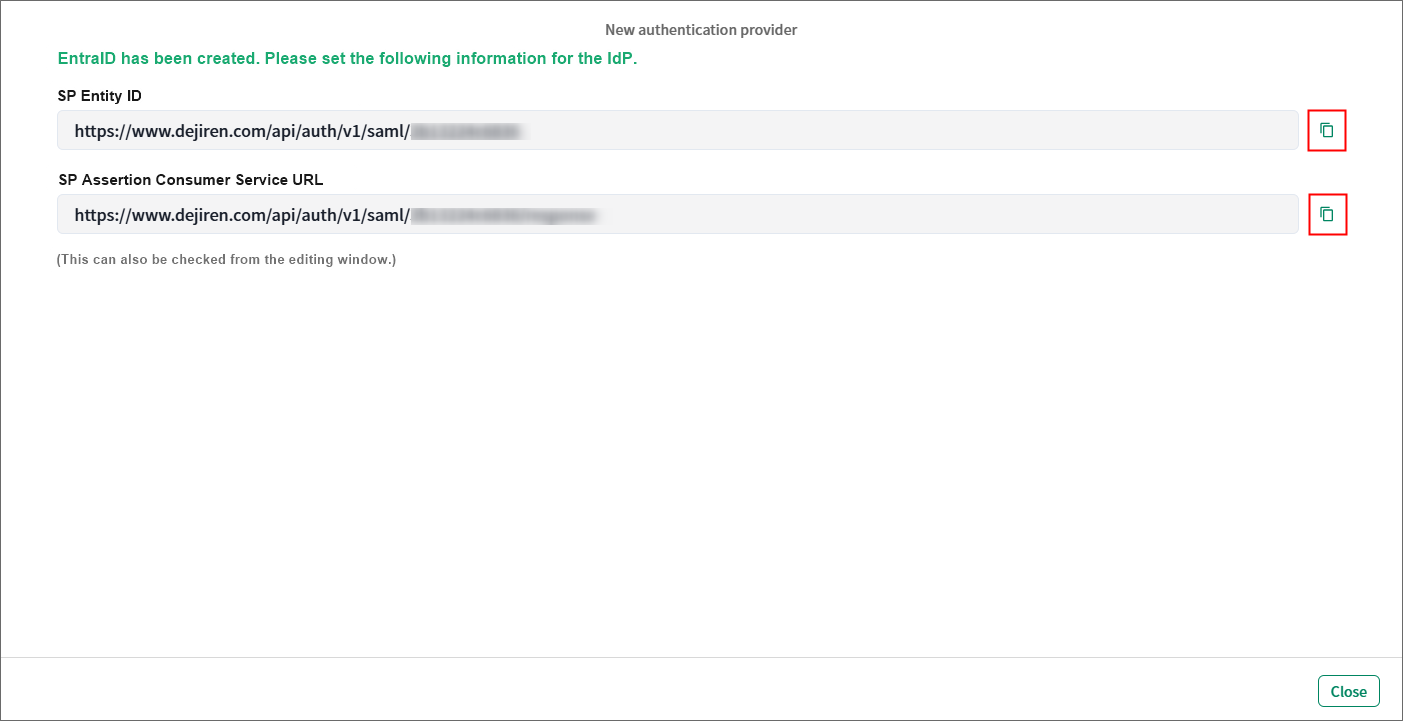
7. Copy the values for SP Entity ID and SP Assertion Consumer Service URL, and paste them to the Excel file “settings_info”.
Step 3: Set the identifier and reply URL
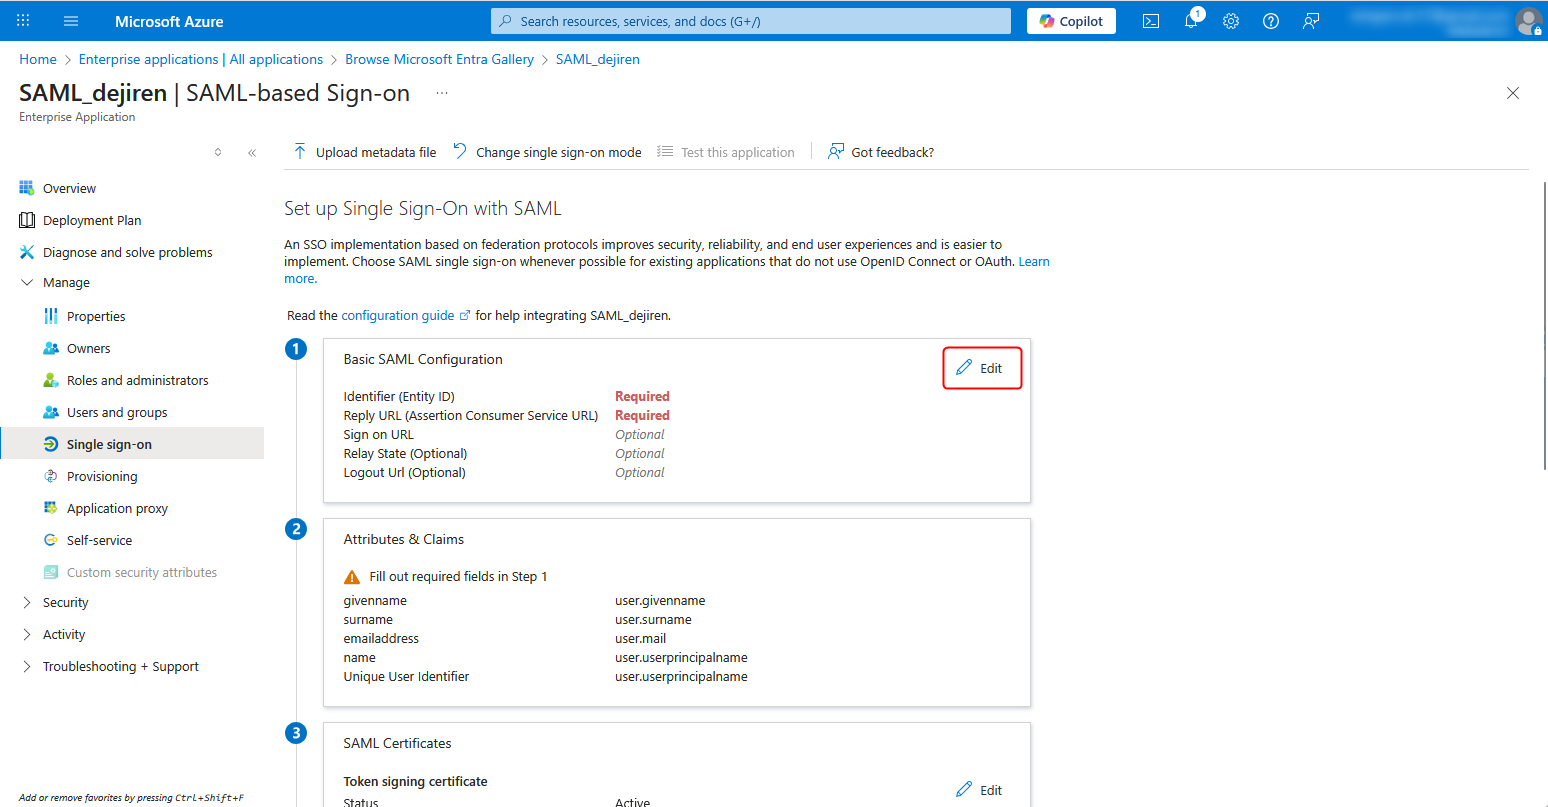
1. Return to the Set up Single Sign-On with SAML page in the Azure portal that you edited in Step 1.
Click Edit for Basic SAML Configuration.
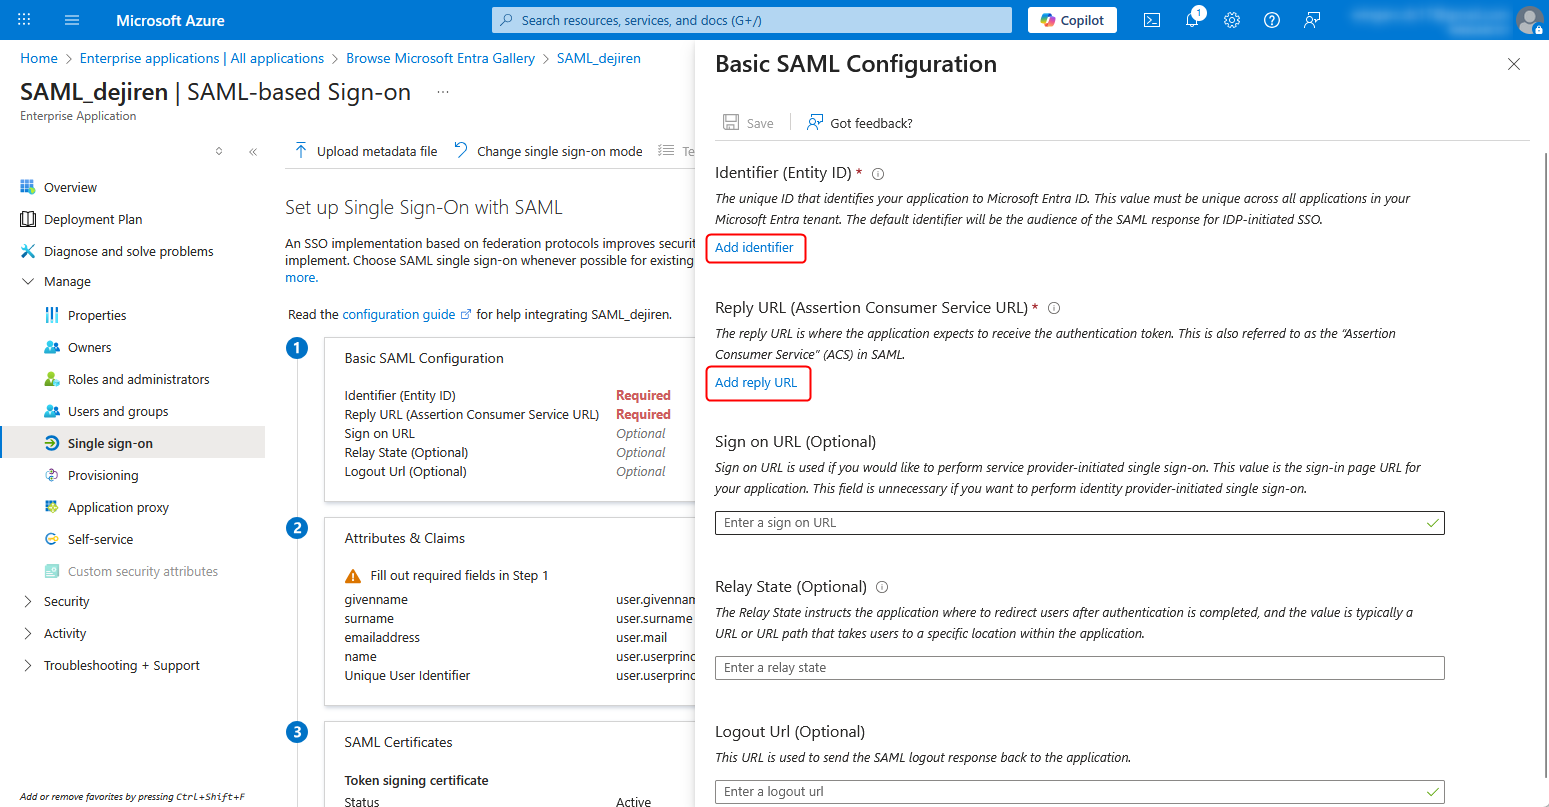
2. Click Add identifier under Identifier (Entity ID) and Add reply URL under Reply URL (Assertion Consumer Service URL).
3. Enter the value for SP Entity ID that you noted down on the Excel file in Step 2-7 in the Identifier (Entity ID) field, and the value for SP Assertion Consumer Service URL in the Reply URL (Assertion Consumer Service URL) field as well.
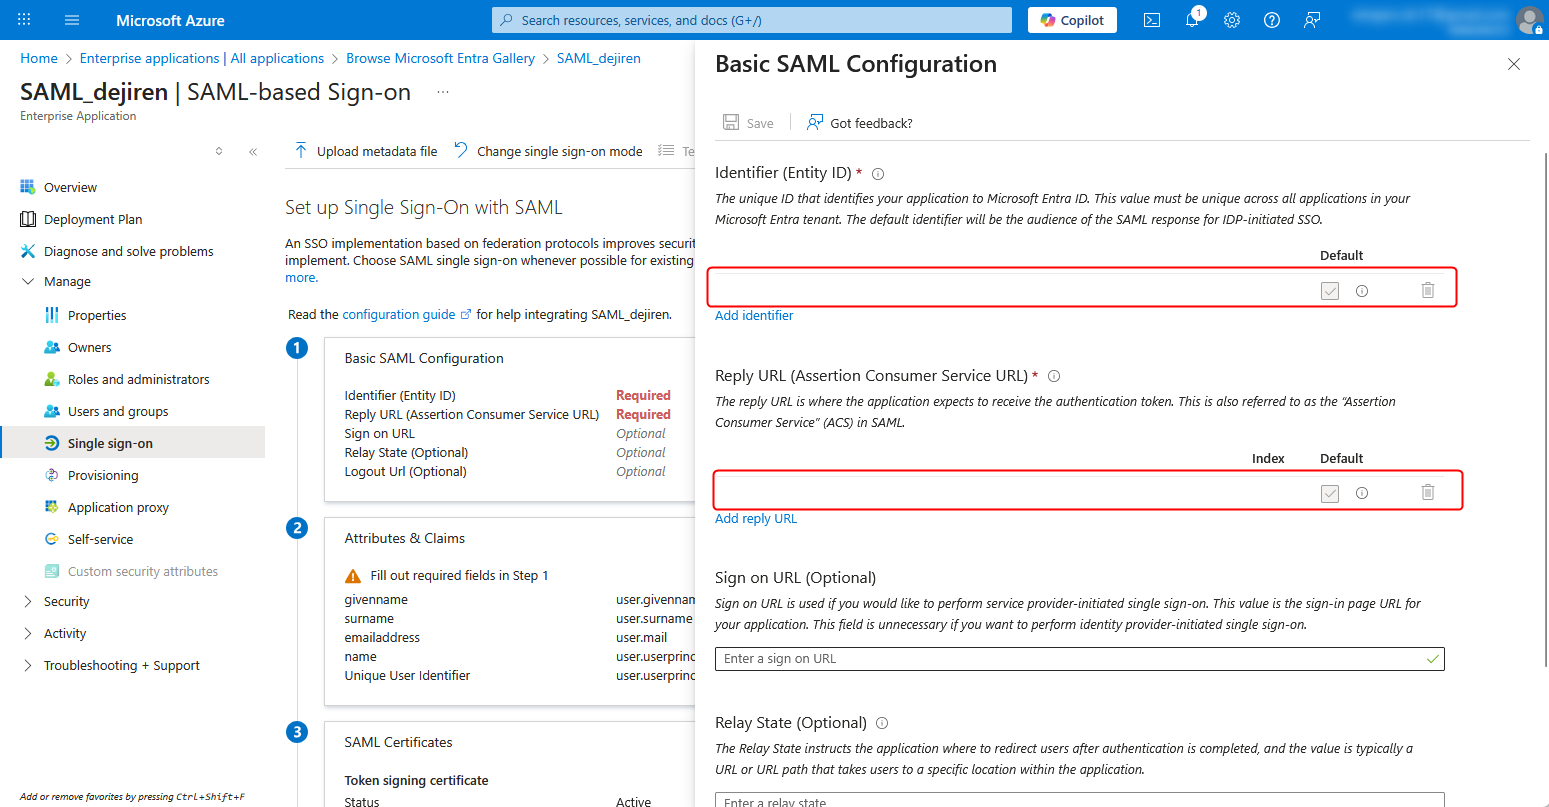
4. Click Save to save the settings.
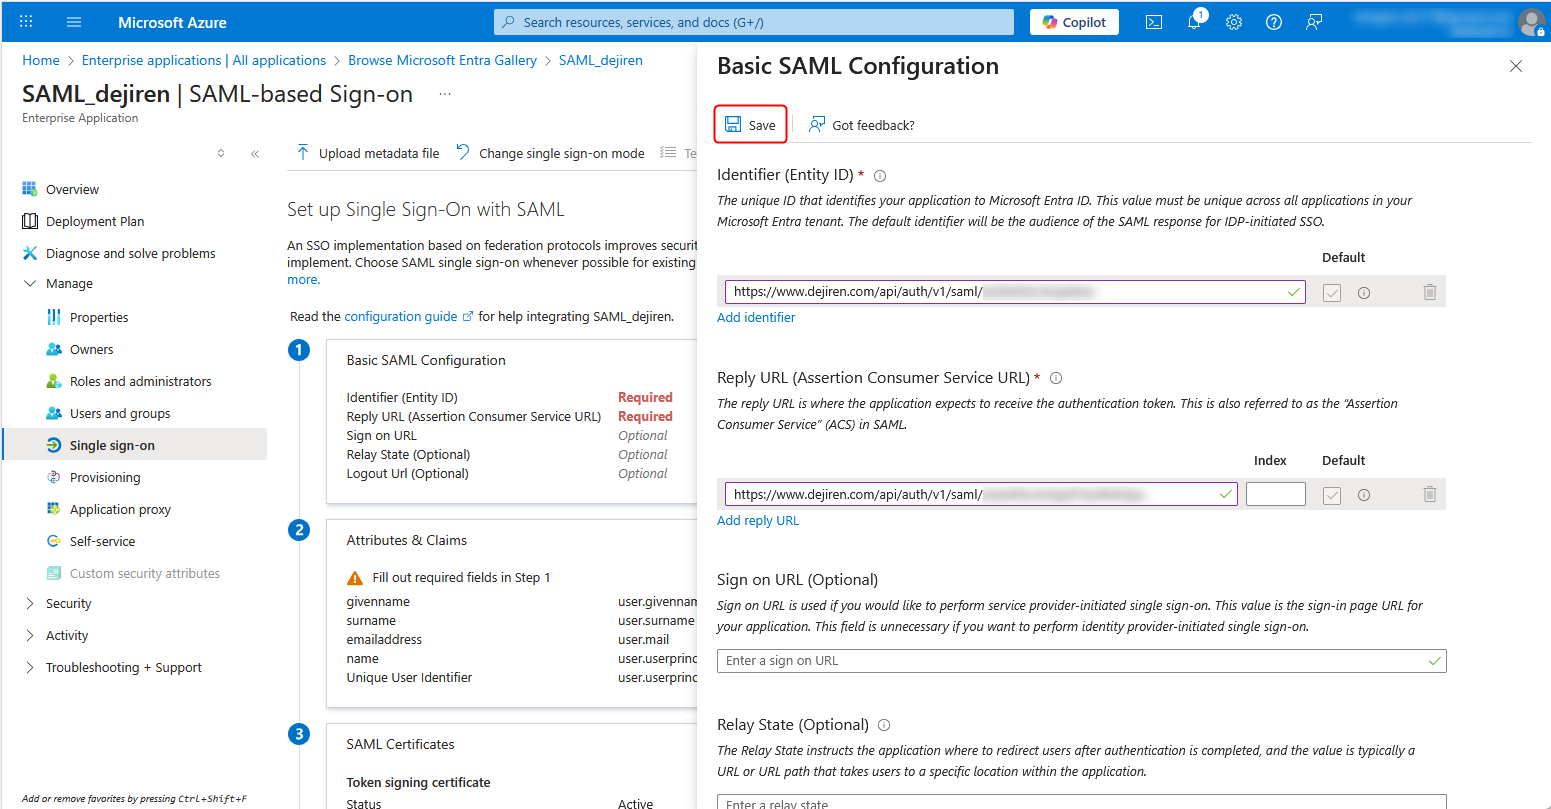
*When you save the settings, a dialog box may appear suggesting a single sign-on test.
If a dialog box appears, select No, I’ll test later.

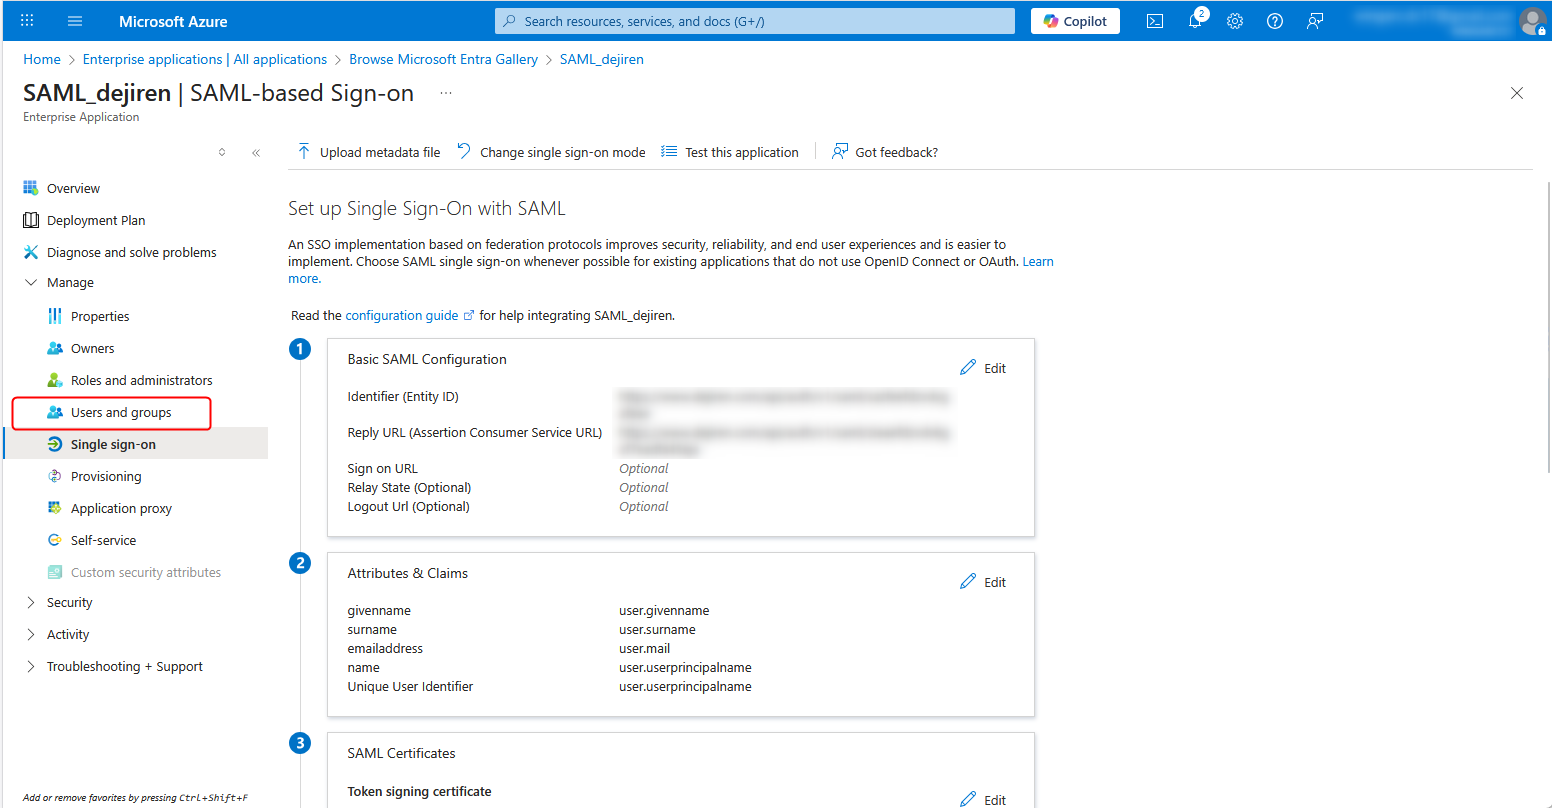
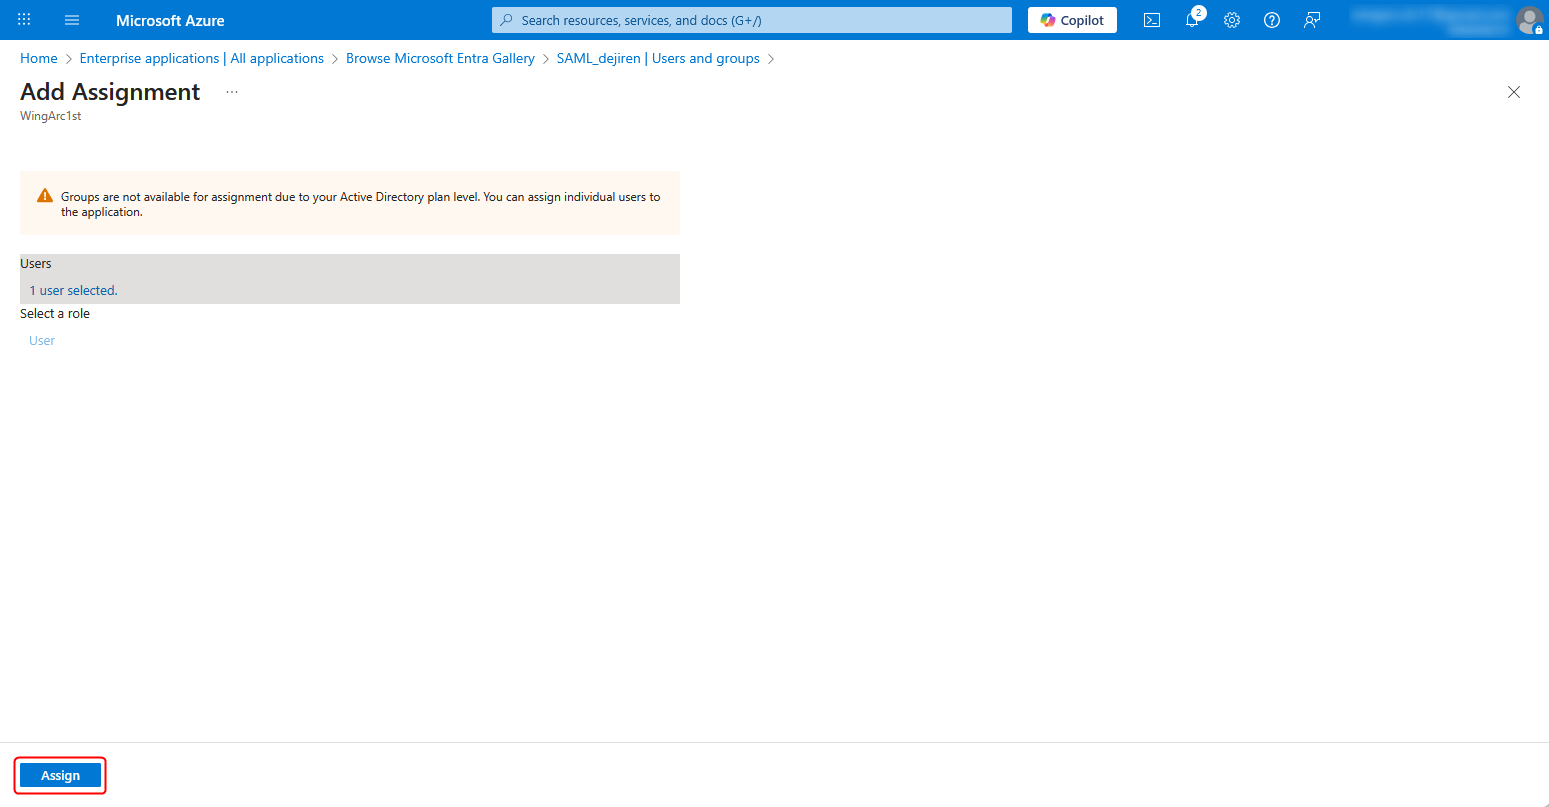
Step 4: Assign users group
1. Click Users and groups.
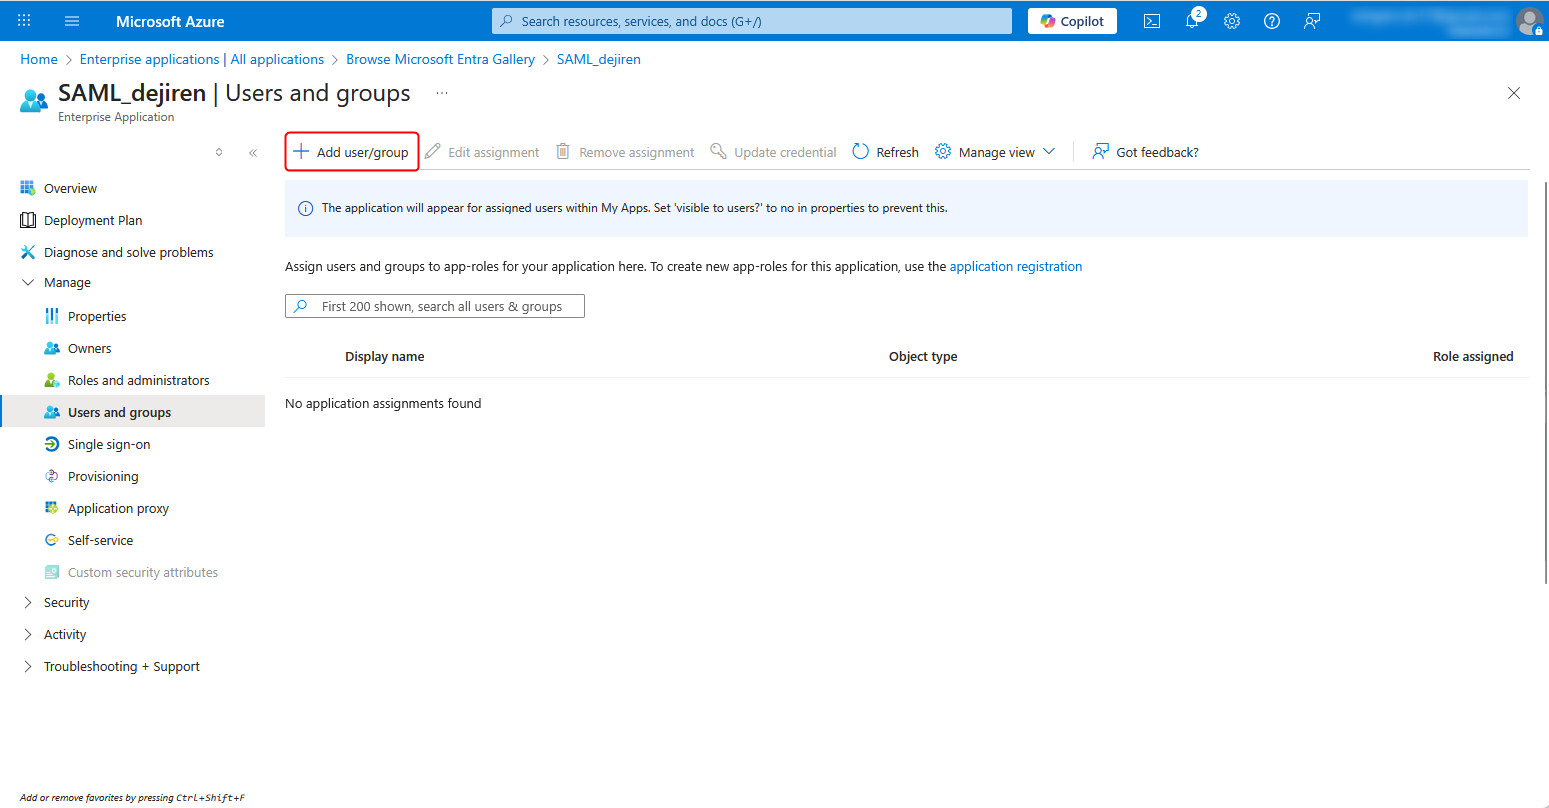
2. Click Add user/group.
3. Click None Selected.
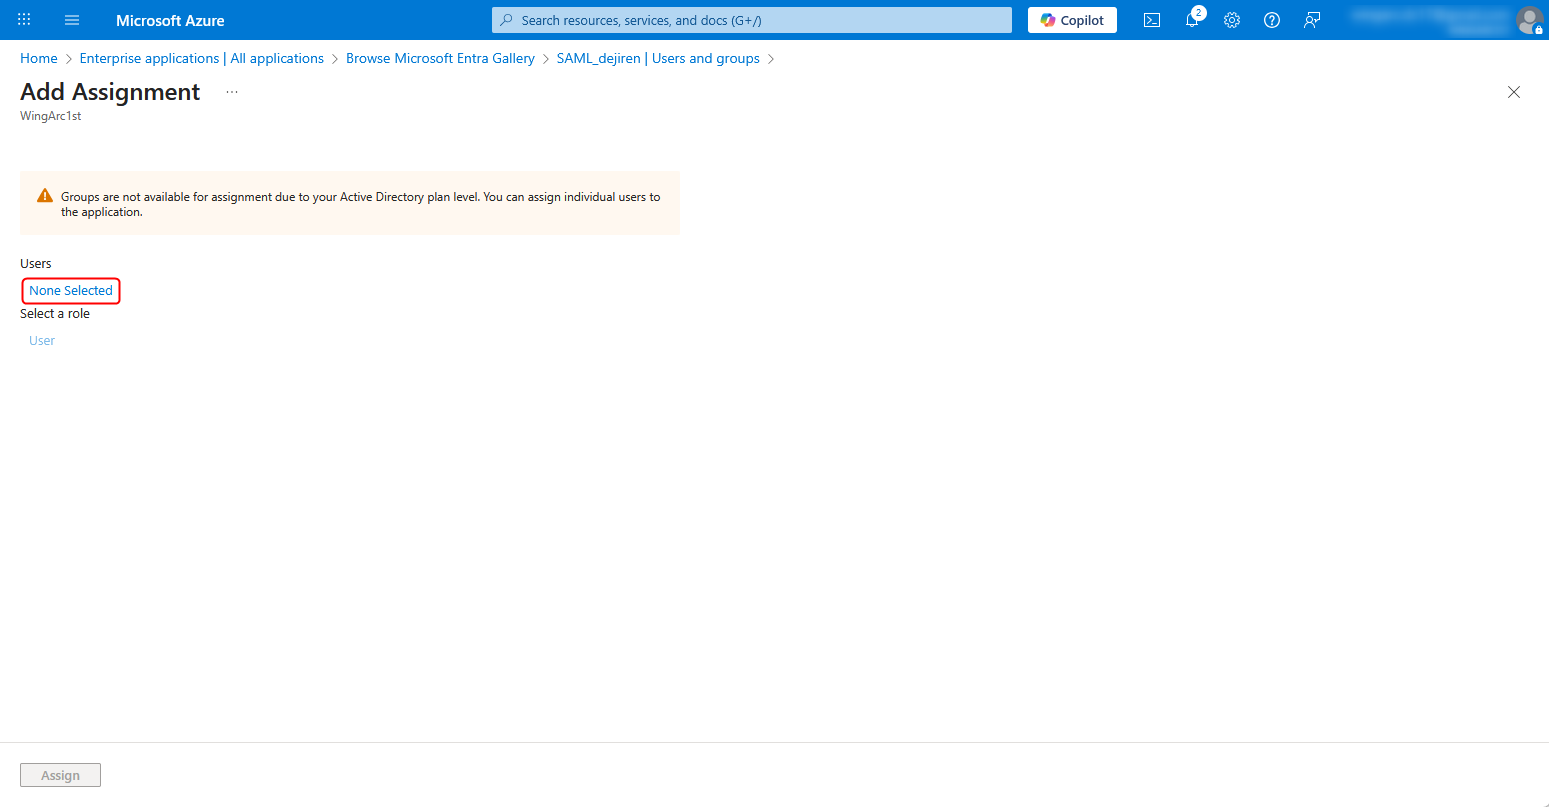
4. Select user(s) or group(s) for which you want to use SAML authentication, and click Select.
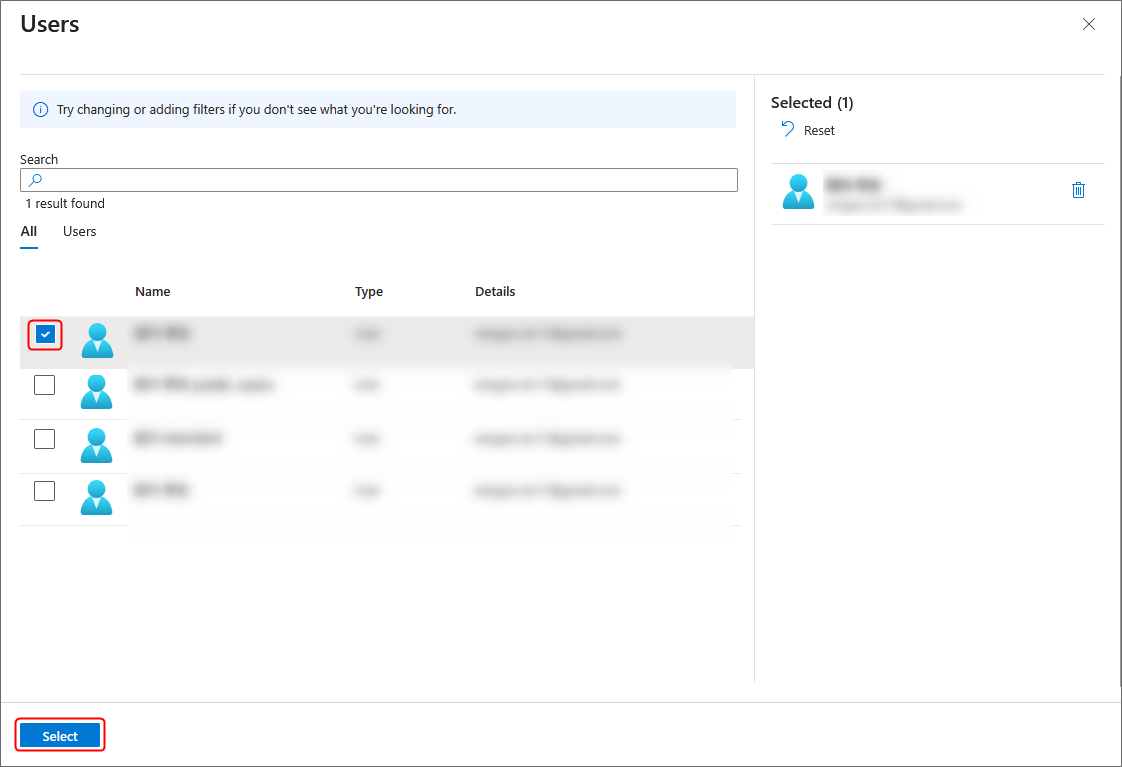
5. Click Assign in the lower left corner of the page.
This completes the configuration for SAML authentication using Microsoft Entra ID.